

Introduction
Whilst working with the DB2 for z/OS REST API, I thought it would be useful to have a tool to make things easier to see what was defined, what the parameter profiles look like and maybe even be able to run the services.
To that end, I’ve written one in VB.NET called wDB2REST. It’s available on GitHub, here:
https://github.com/db2dinosaur/wDB2REST
If you’re not fussed about the source code, you can download the binaries here:
https://github.com/db2dinosaur/wDB2REST/blob/master/wDB2REST/bin/Release/wDB2REST.zip
Disclaimer
The code – both mine and the Newtsoft JSON plugin – are covered by the MIT license. A copy of this is in the LICENSE.md file in the GitHub project root, here:
https://github.com/db2dinosaur/wDB2REST/blob/master/LICENSE.md
Feel free to use the application and its source code in any way you want, but please remember that it is at your own risk.
Installing wDB2REST
The application was built with Microsoft Visual Studio Express 2013 for Desktop. This is one of the free versions of Visual Studio published by Microsoft and includes all of the features that a large mainframe sysprog dinosaur might want for writing some VB code.
Except the Setup and Deployments project templates. So installation is a bit more “copy and run” than Microsoft Installer packages.
If you just pulled the zip file, unpack this into a new directory and you’re done. If you pulled the whole project source tree, the zip file can be found in:
…wDB2RESTbinReleasewDB2REST.zip
Running wDB2REST
I created a shortcut on my Windows desktop to point at the wDB2REST.exe file, and I use that to start the application:
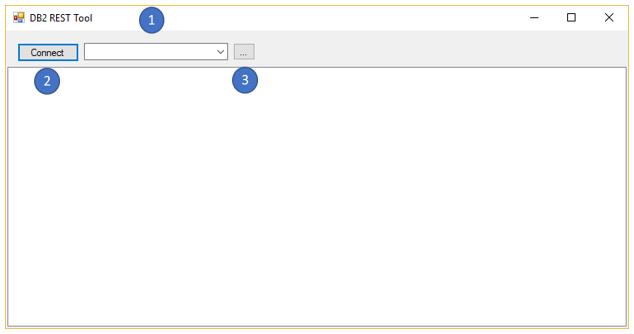
Things of (hopefully) interest:
- Pull down list of connections that you’ve already defined (initially empty). It pre-selects the last session that you were connected to.
- Connections button
- Connect button to connect to the selected session
Defining a New Connection
Connection to the DB2 for z/OS REST API can be in one of three forms:
- HTTP using Basic (userid and password) authentication
- HTTPS (encrypted) using Basic (userid and password) authentication
- HTTPS (encrypted) using client certificate authentication
To define a new connection, click on the Connections (“…”) button:
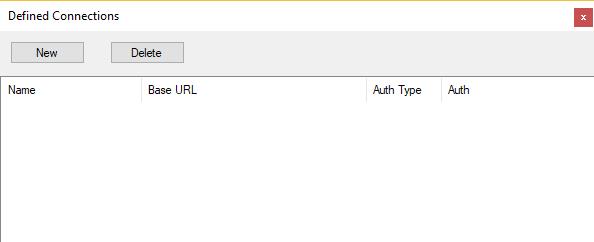
When you click the New button, the New Connection dialogue is displayed. There are three tabs which are used to define different types of connections:
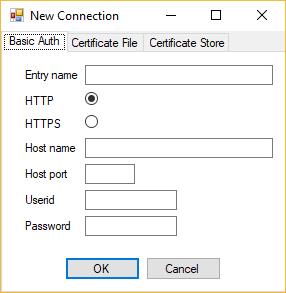
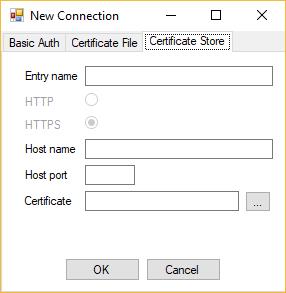
Common fields are:
- “Entry name” is how the name that the connection will appear with in the application and the
- “Host name” and “Host port” are the TCP/IP name / ip address and port for your DB2 service.
There are three different connection types for defining the connection are:
- Basic Auth is used to define a plain mainframe userid/password authenticated connection,
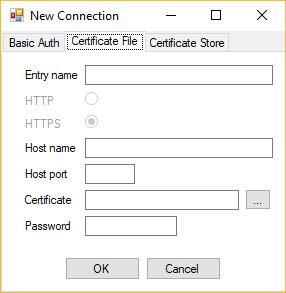
- Certificate File is used for a connection authenticated by a PKCS12 certificate (containing both the certificate and private key) available as a file (.p12), and
- Certificate Store is used for a connection authenticated by a PKCS12 certificate in the Windows current user local certificate store.
If you used:
- Basic Auth, then HTTP or HTTPS can be selected, and the mainframe userid and password need to be supplied. These are saved in the local user part of the registry.
- Certificate File, then the path to the PKCS12 client certificate (containing the certificate and the private key) and the password to access this
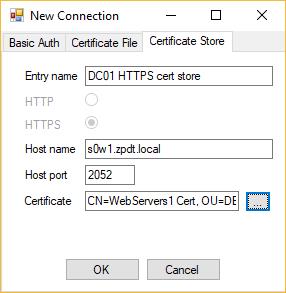
- Certificate Store, then the certificate field contains the selected certificate subject CN
As this is probably the most fiddly bit of the entire app, the following is an example of each type:
Example 1 – Defining a Basic Auth Connection
Connecting to DB2 for z/OS subsystem DC01 using HTTP (on s0w1.zpdt.local with port 2050 – from DSNL004I message in the DC01MSTR or from -DIS DDF DETAIL) using user MYUSER with password XXXXXXXX:

Example 2 – Defining a HTTPS Client Certificate (File) Connection
Connecting to DB2 for z/OS subsystem DC01 using HTTPS (on s0w1.zpdt.local with port 2052 – again from DC01MSTR DSNL004I message or from -DIS DDF DETAIL) using a client certificate held in a file and supplying the password for the certificate so that the private key can be accessed:
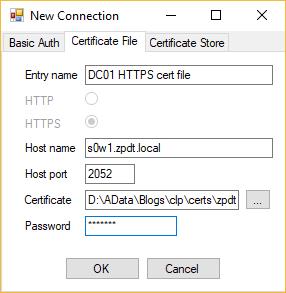
The “…” button displays the file picker dialogue to aid in locating the certificate file.
Example 3 – Defining a HTTPS Client Certificate (Windows Certificate Store) Connection
Connecting to DB2 for z/OS subsystem DC01 using HTTPS (on s0w1.zpdt.local with port 2052) using a client certificate installed in the current user certificate store:
The following is the certificate picker – it lists all certificates that have private keys in the current user local store:
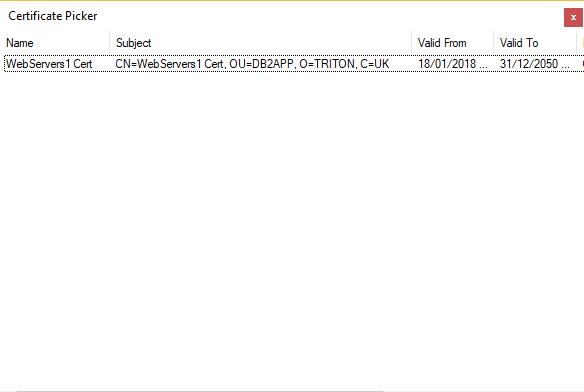
Double-clicking an entry selects it for use, and the subject is retained for fast lookup.
Note that if you want to verify what certificates are currently installed on your machine for your user, you will need to use the Microsoft Management Console (Start->Run->mmc) and add the Certificate snap-in (File->Add/Remove snap-in->Certificates – for “My user”), then look in the Personal -> Certificates folder.
Making a Connection and Listing Services
Once you have a connection defined, return to the main panel, select it from the pull-down list and click on the Connect button. If the connection was successful, you will be presented with a list of services that the ID used for connecting has access to:
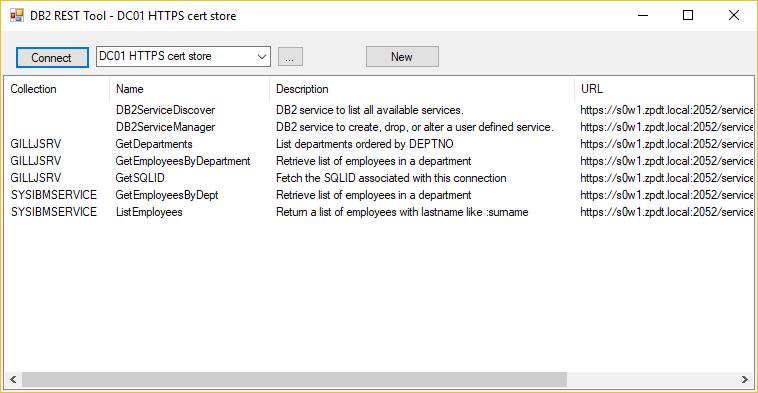
Note that the first two services in the example are the IBM DB2 supplied ones. The services are listed by collection id and then name.
From here you can:
- Double-click on an entry to see the parameter details (also available from right-clicking and selecting Details)
- Run a service by right-clicking on it and selecting Run (you’ll be prompted for parameters)
- Create a new service by clicking the New button
- Drop a service by right-clicking on it and selecting Drop
Here are each of these in a bit more detail:
Showing Service Details
By double-clicking a service in the list, you are shown a panel with the details where available. Note that some result sets (SELECT) are itemised in the ResultSet Output, dynamic result sets (stored procedures) are not.
Here’s an example of double-clicking GILLJSRV.GetEmployeesByDepartment:
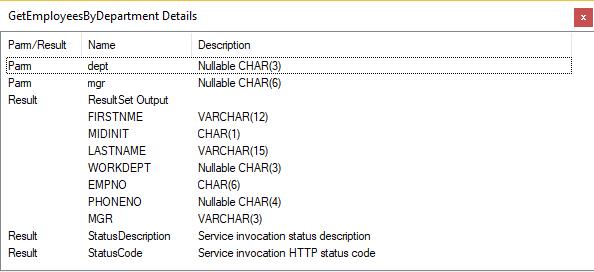
We can see the two input parameters (dept and mgr) and the output result set fields and variables (StatusCode and StatusDescription).
Run a Service
If you right-click on a service and select Run then you are prompted for parameters if the service takes any – e.g. for GetEmployeesByDepartment:
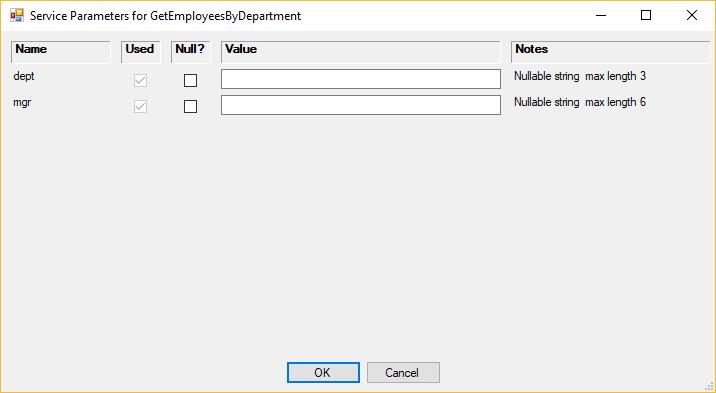
Where:
- “Name” is the name of the parameter
- “Used” indicates if the parameter should be used. Note that this defaults to false except where parameters are required, where it is true.
- “Null” allows nullable fields to be null.
- “Value” is the value that you want to supply for the parameter
E.g. if we want to run with dept = A00 and mgr = 000010, then:
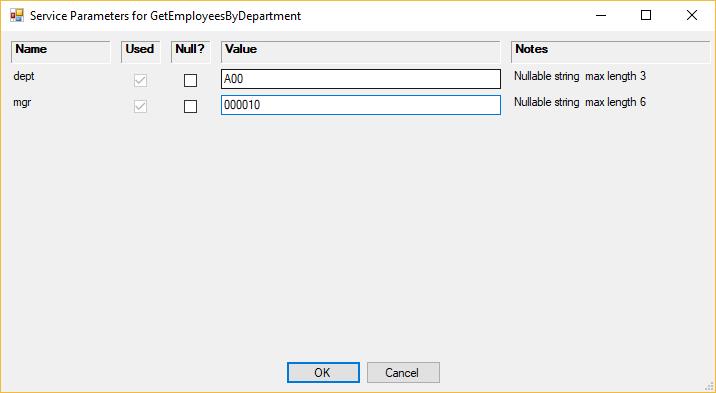
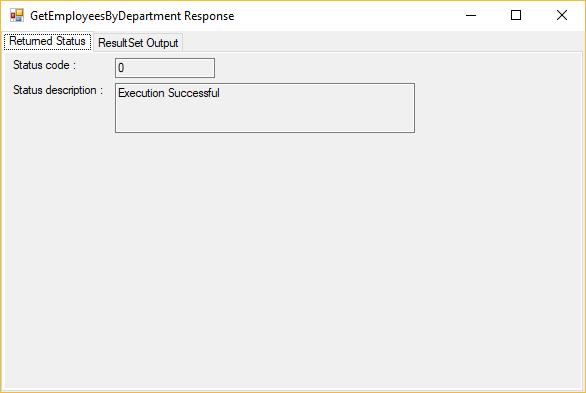
Click on OK then runs the service with the supplied values and returns the results. The first tab of the results display shows the status code and description:
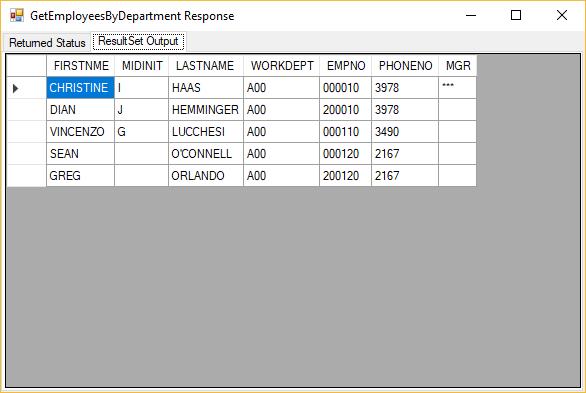
And the second and following tabs show the result sets:
Note that the New service button uses this Run method against the DB2ServiceManager service.
Create a New Service
To create a new service, click on the New button on the main panel. This drives the service Run function against the DB2ServiceManager. There are quite a few parameters, but most are optional:
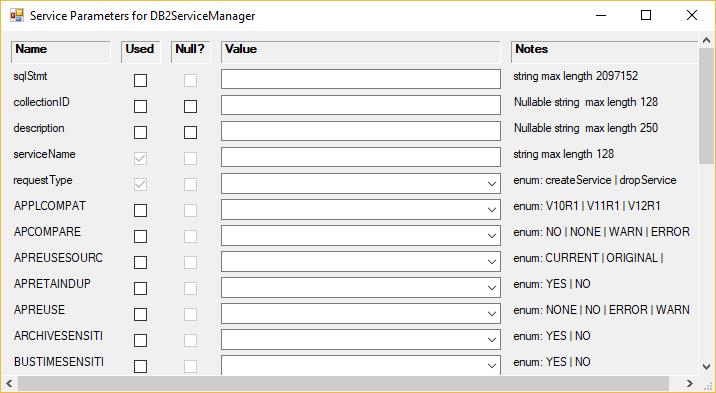
When running DB2ServiceManager the serviceName and requestType parameters are required, but note that when you are creating a service you will need to supply (and tick the Used option):
- sqlStmt – the SQL statement used by the service
- collectionID – the collection to create the service in
- description – so that everyone else knows what it is
This interface with all of the optional parameters is a little fiddly and it is easy to select a pull-down value and forget to tick the used box.
Once you’ve set all of your parameters, scroll to the bottom of the list and click OK or just press Enter.
Dropping a Service
You can choose to drop a service by right-clicking on it and selecting Drop:
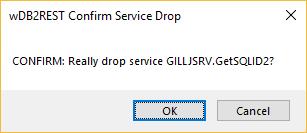
A confirmation is shown and if OK is selected the service is dropped.
Conclusions
I hope you find this useful, and if anyone has any comments or feedback, please feel free to post a reply to the blog. It would be kind if you remember that I’m a mainframe sysprog, though, rather than an interface designer – although that’s probably obvious!
Access all of James Gill’s Native REST API blogs here.