
Part Two – Create and Call a Service
Enabling clients to interact via HTTP GET/POST requests the REST API functionality provides clients a lightweight, modern interface to data stored in DB2 databases. In this series we look at how to get started with the REST API from the DBA’s perspective, in part two we put the DB2 REST capabilities to work by creating and calling services.
Getting an Authentication Token
As our REST API calls are stateless, there is no connection maintained to the server. To avoid having to authenticate against the database for each call the REST service can generate a token which stays valid for a configurable period of time with which the client can identify itself.
Here’s an example of a simple Python script to get a token:
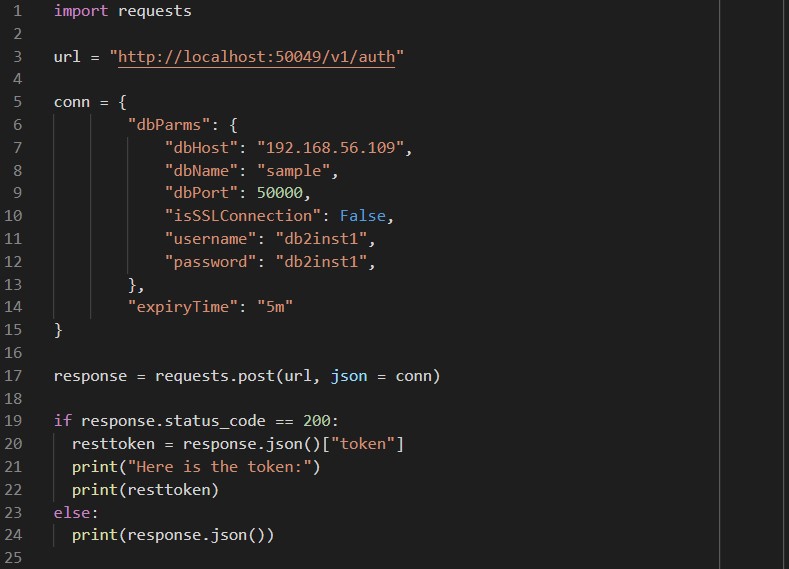
First the script imports the requests library (https://requests.readthedocs.io/en/master/) which will be used to handle the HTTP post and the response, then assigns the URL of our rest server and the connection details to a variable called url and dictionary called conn. With the values set the results of the requests call are assigned to response – the status_code of the response object is checked and if it is 200, which indicates success, the token element of the returned json is extracted to the resttoken variable and printed to the screen. Here’s what it looks like when the script runs:

The token returned is a 512 length character string so should be secure. This token was requested with the expiryTime set to 5 minutes, however, this can be set to anything from nanoseconds to never expiring – in real life use this would need to be set to a value that balances the overhead of authenticating the connections vs. maintaining tokens that are no longer required.
Creating a Service
Now we have an access token we can jump straight in to creating a service. This can be done using REST commands as well – continuing the code, we change the url variable to reference the services endpoint, create a dictionary called headers to pass our authentication token, and create a new dictionary called csrv that contains the json to create a simple service. This service will return the average fare and trip distance for taxi journeys on a date specified by parameter @pdate:
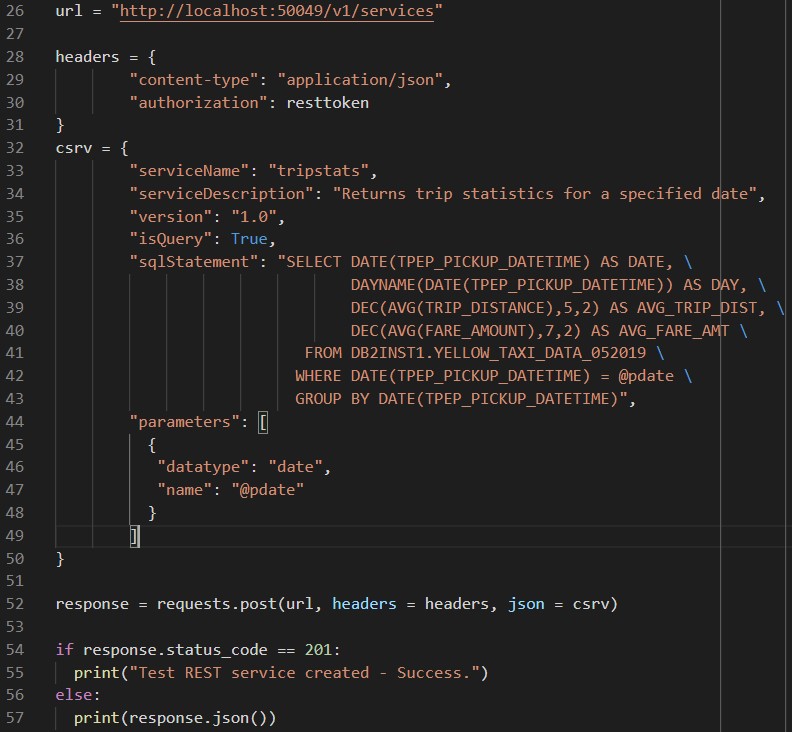
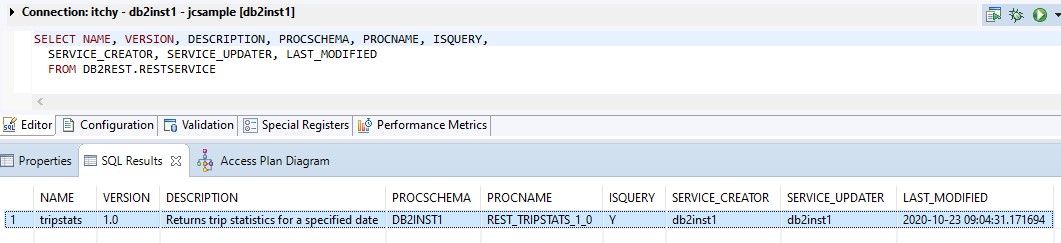
This time the success code is 201, so if that is the response a message is output saying the service was created. There’s not much to see on the command line, but in the database we can see some changes – first up the RESTSERVICE table has a new entry:
And looking at the referenced stored procedure, we can see how the REST service has created the code to wrap the select statement:

Calling a Service
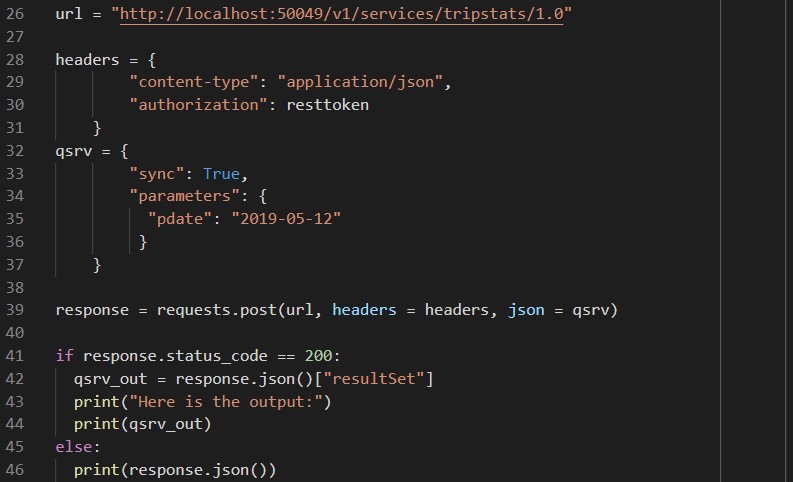
With the service created in the database we can test it out. Using the same code to generate a token, this time the service name and version are added to the url variable, and a dictionary called qsrv is used to pass the @pdate parameter. The qsrv dictionary also has a flag called sync set to true, this is because the code will wait for the query to complete and results to be returned rather than running the query asynchronously. The full JSON returned by the service will include a rowcount and job status information, so the output is parsed to return the contents of ‘resultSet’ only.
On the command line we can see the output returned by the service call. The values are paired with labels for the column names, but interestingly are not in the same order as specified in the SQL. Also of note the DATE datatype has been converted into a string with time information.

Securing the Service
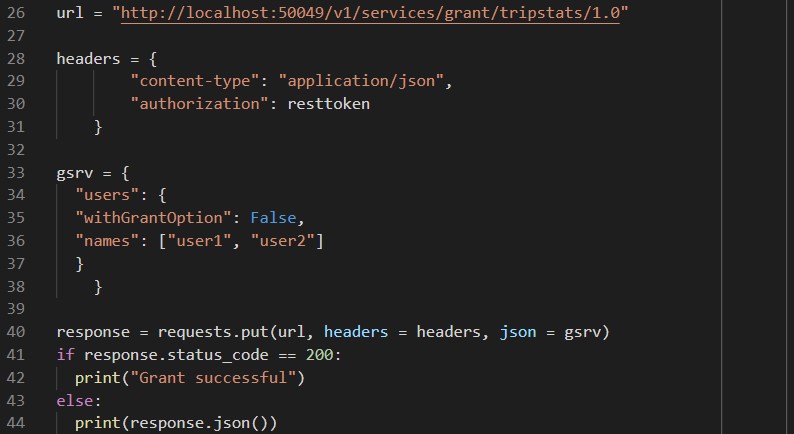
Up until this point all interactions with the REST service have been using a token generated for the db2inst1 user, so we’ve been able to create and call services without having to worry about granting permissions – obviously this isn’t suitable for real world usage, so we’ll need apply appropriate permissions. Here’s a python script to do this via the REST service – the url variable is changed to reference the grant service, and the gsrv dictionary contains the usernames to whom we want to grant access to call the service. In this example we specify users, but the service can grant to groups and roles as well. Note that we’re now using a PUT HTTP request:
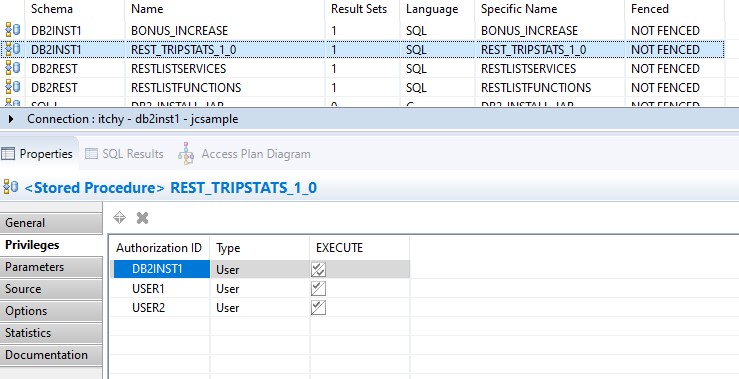
Again, there’s not much to see on the command line after running this script, but we can see the changes the REST service has made in the database – the USER1 and USER2 sample user IDs have been granted execute on the stored procedure itself:
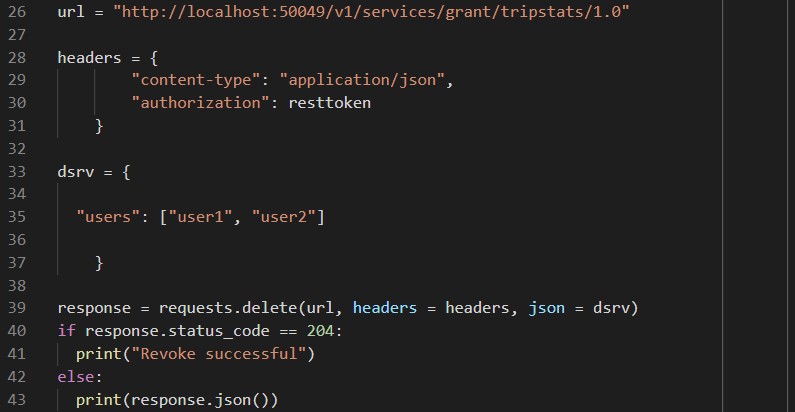
A revoke service is also available – calling this is similar to the grant script as it uses the same service, in this case though the HTTP request is a DELETE:
Nothing to show either on the command line or in the database this time, as you’d expect the permissions we just revoked are gone.
Conclusion
Creating a REST service proved to be quite easy with a basic knowledge of Python. The online documentation provides a great reference of the available features and has examples in JavaScript and Python which were really useful in getting a basic set of scripts set up – if shell scripts are more your style there are also examples using Curl.
Something to be aware of is that it looks like there are some considerations for database housekeeping if using the REST API as the services are stored procedures in the database – anyone who has been using dynamic SQL exclusively may need to look into adding some rebind jobs so the procedures can take advantage of updated statistics.
Currently the REST API will only create services that contain DML (select, insert, update, delete) SQL statements. In the interests of science I did try recreating one of the stored procedures directly in the database with a call to the SYSPROC.ADMIN_CMD procedure to execute runstats on a table, and that worked successfully so it appears there are more possibilities waiting to be unlocked.
In the next part of this blog series we look at maintaining REST services.