

Introduction
We have been working on a series of large scale OpenShift on Z (IBM mainframe) projects for the last couple of years, and have found the platform to be extremely strong – not only in terms of managing workload and resilience, but also in terms of all of the elements included and/or available as add-ons through additional operators, e.g. logging, observability, virtualisation, AI, etc.
We have been looking into developing some additional tooling to support these efforts, but we want to be in a position to develop the skills required to build them on our own platform. One of the things that we like a lot about OpenShift is that it is the same product, regardless of where it is running. True, we would need to rebuild tooling to run on the target architecture, but all of the capabilities on OCP on Z are available on OCP on x86, so developing on Intel and then building for Z feels entirely reasonable.
A development environment is available for free under the Red Hat developers program, but this is restricted to 30 days per year. Alternatives include a trial license (56 days), paying Red Hat (approximately $6,000 per year for our configuration), or running the open-source OKD alternative (the upstream version of OpenShift – similar to Fedora being to RHEL – and also maintained by Red Hat), which is free to use.
This blog will cover running up a trial Single Node OpenShift (SNO) instance on a refurbished Dell R710 server with two Intel X5650 6-core Xeon processors, 128GB of RAM, xGB of SSD and xGB of spinning disk.
This isn’t intended to be an exhaustive “how to” – I won’t be regurgitating the Red Hat documentation to lift my word count, but I will cover the configuration items that were interesting or challenging or just plain weird!
For reference, here are the SNO installation instructions provided by Red Hat:
Preparing the Infrastructure
This really falls into three main themes:
- Networking
- Mirror registry
- Target hardware component IDs
We’ll cover each of these in the following sections.
Networking
Our network to support this has internet connectivity at 55Mbps. This feels like quite a lot until I talk to colleagues who live in cities. The internet service provider unfortunately locks down the DNS configuration – for security reasons – so rather than using the DHCP on the supplied router (provides IP configuration to hosts – IP address, gateway address and DNS address), we have to configure a static IP configuration into the SNO boot. More on this in the section on preparing the installation configuration file (cf Running the Single Node OpenShift Installation, below).
To configure the required DNS entries, we needed to setup a DNS server. This is not something that we’d done before, but turned out to be quite simple using BIND9 on a Raspberry Pi (named pidns, in the config, below). OpenShift requires resolution of a couple of names and one generic name that covers applications – including the web console. As well as resolving the forward entries (names to IP addresses) we also need to provide the reverse lookup (IP address to name):
- api.<cluster>.<domain>
- api-int.<cluster>.<domain>
- *.apps.<cluster>.<domain>
Our cluster was called “sno” and the domain used was “stwihtburh.com”. This gave us the following zone files:
- Forward zone: db.stwihtburh.com:
;
; Config for stwihtburh.com
;
$TTL 86400
@ IN SOA pidns.stwihtburh.com. dnsadmin.stwihtburh.com. (
2025123101 ;Serial
7200 ;Refresh
3600 ;Retry
1209600 ;Expire
3600 ;Negative response caching TTL
);
stwihtburh.com. IN NS pidns.stwihtburh.com.
stwihtburh.com. IN A 192.168.1.1
pidns IN A 192.168.1.1
ocp-mirror IN A 192.168.1.2
gateway IN A 192.168.1.254
sno IN A 192.168.1.40 ; Single Node Openshift
api.sno IN CNAME sno
api-int.sno IN CNAME sno
*.apps.sno IN CNAME sno
- Reverse zone: db.192
;
; Reverse lookup for local network
;
$TTL 604800
@ IN SOA pidns.stwihtburh.com. dnsadmin.stwihtburh.com. (
2 ; Serial
604800 ; Refresh
86400 ; Retry
2419200 ; Expire
604800 ) ; Negative Cache TTL
;
IN NS pidns.
1 IN PTR pidns.stwihtburh.com.
2 IN PTR ocp-mirror.stwihtburh.com.
40 IN PTR sno.stwihtburh.com.
254 IN PTR gateway.stwihtburh.com.
As can be seen from the DNS entries, the SNO host is to be configured as 192.168.1.40 and will be referencing the new DNS server at 192.168.1.1 (pidns). Note also that we’ve added 192.168.1.2 as ocp-mirror – more on this in the next section.
Mirror Registry
In our first attempt to run the installation, we found that our internet connection was just not fast enough, and the install failed because it couldn’t pull the container images from Red Hat promptly enough, and so timed out.
To overcome this, we needed to make the images available locally. A number of different products can be used to achieve this, but Red Hat has made available a cut down version of Quay called the “mirror registry for Red Hat OpenShift”.
It is simple to install (lots of good documentation available here), and can be administered from a configuration file and a simple command.
We ran this on an old laptop running Red Hat Enterprise Linux 9.6. Note that some care should be taken when setting up the config file – if you specify the Operator index to mirror operators as well, but you don’t provide a list of operators, it will mirror the whole lot (nearly 400GB). On our internet connection that would have take over 4 days!
Some of the images (see comments below about the openshift-release image) are quite large, and can run into the default image download timeout of 10 minutes. This can be overridden though – we reset this to 30 minutes and didn’t have any trouble establishing the mirror.
To access the source registries, you will need the pull-secret provided by Red Hat. This contains base64 encoded user/password connection authorisations to the following registries:
- cloud.openshift.com
- quay.io
- registry.connect.redhat.com
- refistryredhat.com
The pull-secret, along with the auth details for our mirror registry all have to be pushed to the $XDG_RUNTIME_DIR/containers/auth.json file. This is used to supply connection authentication for all of the registries used.
{
"auths": {
"ocp-mirror.stwihtburh.com:8443": {
"auth": "<base64-encoding>",
"email": "james.gill@triton.co.uk"
},
"cloud.openshift.com": {
"auth": "<base64-encoding>",
"email": "james.gill@triton.co.uk"
},
"quay.io": {
"auth": "<base64-encoding>",
"email": "james.gill@triton.co.uk"
},
"registry.connect.redhat.com": {
"auth": "<base64-encoding>",
"email": "james.gill@triton.co.uk"
},
"registry.redhat.io": {
"auth": "<base64-encoding>",
"email": "james.gill@triton.co.uk"
}
}
}
Where <base64-encoding> is the base64 of user:password for the specific registry and can be generated with the following command:
- echo -n ‘myuserid:mypassword’ | base64 -w0
The “what to mirror” configuration is the imagesetconf.yaml:
kind: ImageSetConfiguration
apiVersion: mirror.openshift.io/v2alpha1
mirror:
platform:
channels:
- name: stable-4.20
minVersion: 4.20.6
maxVersion: 4.20.8
graph: true
operators:
- catalog: registry.redhat.io/redhat/redhat-operator-index:v4.20
packages:
- name: cluster-logging
- name: cluster-observabillity-operator
additionalImages:
- name: registry.redhat.io/ubi9/ubi:latest
- name: registry.redhat.io/ubi9/ubi-init:latest
- name: registry.redhat.io/ubi9/ubi-minimal:lates
The package names for the operators can be extracted from the operator index using the “opm” command (download from the Downloads tab in the OpenShift section of the Red Hat console here):
- opm render registry.redhat.io/redhat/redhat-operator-index:v4.20 | jq -cs ‘[.[] | select(.schema=”olm.bundle”) | .package] | unique[]’
To start the mirror sync, use the following command:
- oc mirror -c imagesetconfig.yaml – -workspace file:///home/james/resource docker://ocp-mirror.stwihtburh.com:8443 – -v2 – -dest-tls-verify=false – -image-timeout 30m
Where:
- imagesetconfig.yaml is the config file (above)
- workspace /home/james/resource is where the mirror sync writes useful information – e.g. the image digest mirror sets for the mirror (which we use later on)
- docker://ocp-mirror.stwihtburh.com:8443 is the URL of the mirror that we’re running
- – -dest-tls-verify=false turns off SSL certificate verification on our mirror registry, because we haven’t installed a valid certificate for it
After a while (I left it running overnight, so can’t be more helpful than that!) the mirror will sync and the images will be available. They’ll be even more available when we remember to open the mirror registry port in firewalld:
- sudo firewall-cmd – -permanent – -add-port=8443/tcp
- sudo firewall-cmd – -permanent – -add-port=8443/udp
- sudo firewall-cmd – -reload
Red Hat Core OS Live ISO
The rhcos-live ISO will be used to boot the installation process, and will need to be downloaded. It is also used in the next step to get the hardware component IDs that we will need to setup the installation config file.
See section 2.2.1 of the installation documentation for instructions on how to locate the right version of the live ISO. When we were doing this, the method that should produce the URL was not working, but it can be downloaded from the OpenShift Downloads section of the Red Hat Hybrid Console (see above), or download it here
(from https://access.redhat.com/solutions/5670481)
The easiest way to create a bootable USB drive from this ISO image in Linux is to use the “dd” command:
- sudo dd if=rhcos-live.iso of=/dev/sde oflag=sync status=progress
Where /dev/sde is the targeted USB drive – you can check this with “sudo fdisk -l” before issuing the command to avoid unnecessary excitement.
Target Hardware Component IDs
When we are configuring the OpenShift installation, we need two bits of hardware information to supply the MAC address for the network adapter that we’re going to use, and the disk ID to ensure that we reliably reference the correct disk.
Disks can be addressed in a number of ways in Linux, but it is worth noting that the device names are not guaranteed to be the same, and this is why – to be sure – we should use the ID addressing. To make sure we were using the right ID:
- Boot the target server with the rhcos-live.iso image. This is a live CD build of Red Hat Core OS (the operating system that Openshift runs on top of) and has a fairly complete shell command environment. Use the following commands:
- sudo -i
- Switch to root – with great power…
- fdisk -l
- List the disks online to the server. There’s lots going on here, but each disk will have information about capacity, number of partitions on it and some information to help identify it. It will also have a device name – of the form /dev/sda, /dev/sdb. Our target is /dev/sdb (and SSD drive)
- ls -al /dev/disk/by-id
- Here we can see the various available IDs, and which /dev/sd<a> devices they map to. Make a note of the ID for your intended disk. Here’s part of the output for our server, showing the IDs available for /dev/sdb
drwxr-xr-x. 2 root root 800 Jan  7 12:09 .

drwxr-xr-x. 9 root root 180 Jan  7 12:09 ..

lrwxrwxrwx. 1 root root   9 Jan  7 12:09 scsi-36d4ae5209c7401002308484b04d9aee4 -> ../../sdb

lrwxrwxrwx. 1 root root  10 Jan  7 12:09 scsi-36d4ae5209c7401002308484b04d9aee4-part1 -> ../../sdb1

lrwxrwxrwx. 1 root root  10 Jan  7 12:09 scsi-36d4ae5209c7401002308484b04d9aee4-part2 -> ../../sdb2

lrwxrwxrwx. 1 root root  10 Jan  7 12:09 scsi-36d4ae5209c7401002308484b04d9aee4-part3 -> ../../sdb3

lrwxrwxrwx. 1 root root  10 Jan  7 12:09 scsi-36d4ae5209c7401002308484b04d9aee4-part4 -> ../../sdb4

lrwxrwxrwx. 1 root root   9 Jan  7 12:09 scsi-SDELL_PERC_H700_00e4aed9044b4808230001749c20e54a -> ../../sdb

lrwxrwxrwx. 1 root root  10 Jan  7 12:09 scsi-SDELL_PERC_H700_00e4aed9044b4808230001749c20e54a-part1 -> ../../sdb1

lrwxrwxrwx. 1 root root  10 Jan  7 12:09 scsi-SDELL_PERC_H700_00e4aed9044b4808230001749c20e54a-part2 -> ../../sdb2

lrwxrwxrwx. 1 root root  10 Jan  7 12:09 scsi-SDELL_PERC_H700_00e4aed9044b4808230001749c20e54a-part3 -> ../../sdb3

lrwxrwxrwx. 1 root root  10 Jan  7 12:09 scsi-SDELL_PERC_H700_00e4aed9044b4808230001749c20e54a-part4 -> ../../sdb4

lrwxrwxrwx. 1 root root   9 Jan  7 12:09 wwn-0x6d4ae5209c7401002308484b04d9aee4 -> ../../sdb

lrwxrwxrwx. 1 root root  10 Jan  7 12:09 wwn-0x6d4ae5209c7401002308484b04d9aee4-part1 -> ../../sdb1

lrwxrwxrwx. 1 root root  10 Jan  7 12:09 wwn-0x6d4ae5209c7401002308484b04d9aee4-part2 -> ../../sdb2

lrwxrwxrwx. 1 root root  10 Jan  7 12:09 wwn-0x6d4ae5209c7401002308484b04d9aee4-part3 -> ../../sdb3

lrwxrwxrwx. 1 root root  10 Jan  7 12:09 wwn-0x6d4ae5209c7401002308484b04d9aee4-part4 -> ../../sdb4

lrwxrwxrwx. 1 root root   9 Jan  7 12:09 wwn-0x6d4ae5209c7401002308485c05dac6e9 -> ../../sda
We used “scsi-SDELL_PERC_H700_00e4aed9044b4808230001749c20e54a”
It’s worth also noting whilst we’re looking at disks and partitions that if there are other disks in the configuration, it is probably worth noting that the reboot during the installation will fail if they also contain a [boot] partition. We cleared down the partition on /dev/sda to clear this problem – and the intention was always to use this with the local storage and LVM operators anyway.
Before shutting down the RHCOS live DVD boot, capture the MAC address and name of the network adapter that you intend using – e.g.
- ip addr
This is the part of the output for our adapter:
2: eno1: <BROADCAST,MULTICAST,UP,LOWER_UP> mtu 1500 qdisc mq state UP group default qlen 1000
link/ether 84:2b:2b:58:f5:9d brd ff:ff:ff:ff:ff:ff
altname enp1s0f0
inet 192.168.1.40/24 brd 192.168.1.255 scope global dynamic noprefixroute eno1
valid_lft 84804sec preferred_lft 84804sec
So the adapter name is “eno1” and the MAC address is “84:2b:2b:58:f5:9d”
Running the Single Node OpenShift Installation
The installation makes use of the rhcos-live.iso (see previous section) and we apply an ignition config file to this, and in our case, a static IP configuration.
Creating the Install Config File
The ignition file is created from a YAML installation configuration file, which contains information and data generated in previous steps. Here’s a partially anonymised version of the one (install-config.yaml) that we used:
apiVersion: v1
baseDomain: stwihtburh.com</code?

compute:

- name: worker

replicas: 0

controlPlane:

name: master

replicas: 1

hyperthreading: Enabled

metadata:

name: sno

networking:

clusterNetwork:

- cidr: 10.128.0.0/14

hostPrefix: 23

machineNetwork:

- cidr: 192.168.1.40/32

networkType: OVNKubernetes

serviceNetwork:

- 172.30.0.0/16

platform:

none: {}

bootstrapInPlace:

installationDisk: /dev/disk/by-id/scsi-SDELL_PERC_H700_00e4aed9044b4808230001749c20e54a

pullSecret: '<registry-auths>’

sshKey: |

ssh-rsa <public-key>

additionalTrustBundle: |

-----BEGIN CERTIFICATE-----

:

-----END CERTIFICATE-----

ImageDigestSources:

- mirrors:

- ocp-mirror.stwihtburh.com:8443/openshift-logging

source: registry.redhat.io/openshift-logging

- mirrors:

- ocp-mirror.stwihtburh.com:8443/openshift/release

source: quay.io/openshift-release-dev/ocp-v4.0-art-dev

- mirrors:

- ocp-mirror.stwihtburh.com:8443/openshift/release-images

source: quay.io/openshift-release-dev/ocp-release

- mirrors:

- ocp-mirror.stwihtburh.com:8443/ubi9

source: registry.redhat.io/ubi9
Where:
- baseDomain is our base network domain
- the number of workers is set to zero
- the number of masters (control plane nodes) is set to one
- the name of the cluster is “sno”. This and the baseDomain are used to assemble the service points in the cluster
- networking – cluster network is the network range used to assign pod IP addresses inside the cluster, service network is the IP address range used by services and machine network is the IP address range used by the nodes. The actual IP configuration for the node is handled by another file (see below)
- bootstrapInPlace – configure the SNO server disk to install and boot from
- pullSecret – this needs to be the complete pull secret set – i.e. the auth details from the Red Hat supplied pull secret, as well as the auth details for the mirror registry. This is the contents of the mirror registry server auth.json, inside single quotes.
- sshKey is to establish a way for us to login to the SNO server to check installation progress and handle any error conditions. Use the user public SSH id file – e.g. ~/.ssh/id_rsa.pub
- additionalTrustBundle is the root CA for the mirror registry. The certificate is created during the installation of the mirror registry and can be found in ~/quay/quay-rootCA/rootCA.pem where ~/quay is setup as the – -quayRoot in the registry install
- ImageDigestSources define the mappings from the original Red Hat source registries to our mirror registry. They are produced by the “oc mirror” command and can be found in ~/resource/working-dir/cluster-resources/idms-oc-mirror.yaml where ~/resource is from the – -workspace parameter in the “oc mirror” command (see above).
Creating the Ignition File
Because the install-config.yaml file is consumed in the next step, it is important to perform the manifest and ignition file creation on a copy of it. We created a path and copied the file in from our HOME, which meant we always retained the original source copy:
- cd ~
- mkdir ocp
- cp install-config.yaml ocp/
Now we can create the manifests and ignition file, like this:
- openshift-install create manifests – -dir ocp
- openshift-install create single-node-ignition-config – -dir ocp
We should now have a file called bootstrap-in-place-for-live-iso.ign in the ocp directory.
Creating the Static IP Configuration File
The other file that we need is the static IP configuration file – eno1.nmconnection:
[connection]

id=eno1

type=ethernet

interface-name=eno1
[802-3-ethernet]

mac-address=84:2b:2b:58:f5:9d
[ipv4]

method=manual

addresses=192.168.1.40/24

gateway=192.168.1.254

dns=192.168.1.1
[ipv6]

method=ignore
[proxy]
Preparing the Installation Boot Media
The Red Hat Core OS Live ISO that we used previously when booting the server to find the hardware IDs that we needed for the installation can now be reused.
When we downloaded it, we saved it as ~/Downloads/rhcos-live.iso.
As with the install-config.yaml file, we felt it was better to update a copy of the ISO and retain the original if we needed to rerun the following commands. The tool for modifying the ISO is available as a container image, and as the podman command to run it up is quite long, Red Hat recommend creating a command alias:
- alias coreos-installer=’podman run –privileged –pull always –rm \
-v /dev:/dev -v /run/udev:/run/udev -v $PWD:/data \
-w /data quay.io/coreos/coreos-installer:release’
We can then use this command to apply the two files to the ISO:
- cp Downloads/rhcos-live.iso ~/
- coreos-installer iso network embed –keyfile eno1.nmconnection rhcos-live.iso
- coreos-installer iso ignition embed -fi ocp/bootstrap-in-place-for-live-iso.ign rhcos-live.iso
Then we just need to apply the ISO file to another USB drive – see notes above about using “dd”.
Booting the Installer
Plug the USB drive in and boot the server. In our case we needed to hammer away on F11 to get to the boot device selection, but your mileage may vary. Because our server was a little elderly, we had a simple BIOS boot from the USB drive, and the installation immediately starts.
A command is available to track the installation process. It can be run at any point, but will produce a lot of error messages until the Openshift API is started and available. Note also that it times out after 40 minutes, but can just be re-issued:
- openshift-install –dir=ocp wait-for install-complete
We can also SSH onto the server to check in the journal:
- ssh sno.stwihtburh.com
- Make sure to issue this from the account on the machine that you provided the contents of the .ssh/id_rsa.pub file from into the sshKey install-config.yaml file
- journalctl -xe
- This is probably the best source of information if things get stuck or the install fails.
In our case, after around 45 minutes, the install had completed and the server rebooted. Openshift then starts and runs a number of additional install pods to complete the process. If you’re using the “openshift-install” wait-for-install-complete command (above), success with be reported like this:
[james@ocp-mirror ~]$ openshift-install --dir=ocp wait-for install-complete

INFO Waiting up to 40m0s (until 5:26PM GMT) for the cluster at https://api.sno.stwihtburh.com:6443 to initialize...

INFO Waiting up to 30m0s (until 5:16PM GMT) to ensure each cluster operator has finished progressing...

INFO All cluster operators have completed progressing

INFO Checking to see if there is a route at openshift-console/console...

INFO Install complete!

INFO To access the cluster as the system:admin user when using 'oc', run

INFO     export KUBECONFIG=/home/james/ocp/auth/kubeconfig

INFO Access the OpenShift web-console here: https://console-openshift-console.apps.sno.stwihtburh.com

INFO Login to the console with user: "kubeadmin", and password: "<pwd>"

INFO Time elapsed: 0s
Note that the web console URL is reported, as well as the kubeadmin password.
An additional command line check:
[james@ocp-mirror ~]$ export KUBECONFIG=/home/james/ocp/auth/kubeconfig

[james@ocp-mirror ~]$ oc get nodes

NAME                 STATUS   ROLES                  AGE   VERSION

sno.stwihtburh.com   Ready    control-plane,master   18m   v1.33.6
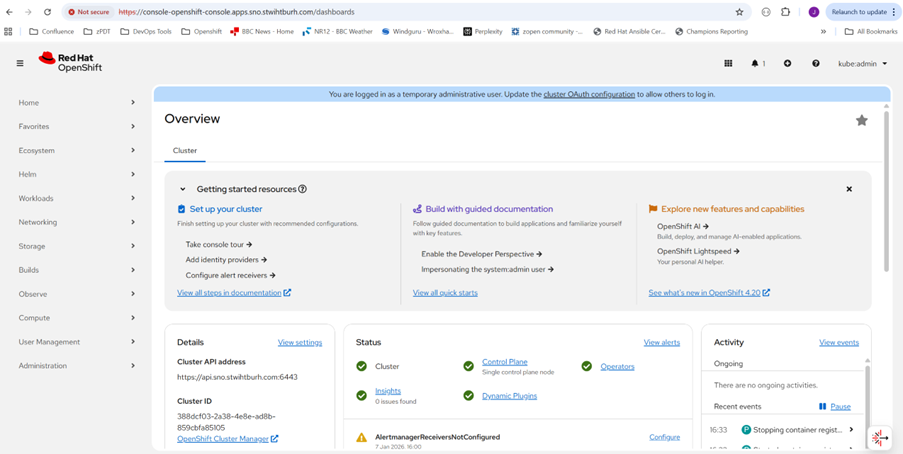
And checking the web console URL with the supplied kubeadmin password:
Conclusions
The documented installation instructions are probably great for customers working with a DHCP based IP address for their SNO server, and with a robust enough internet connection to be able to stream all of the required container images in a timely manner. Sadly, that wasn’t us.
On the other hand, this was a valuable learning experience. Whilst the base documentation didn’t really help us understand how to overcome some of the challenges we faced, the Red Hat support cases certainly did.
A running Red Hat OpenShift environment would be extremely useful from a development point of view, but I suspect that we will probably have a look at OKD, not just because of the not insignificant price, but also because running on the upstream alternative will give us an earlier view of new features.