
Introduction
Red Hat’s OpenShift Container Platform (OCP) is a container platform orchestrated and managed by Kubernetes and implemented on special build versions of Red Hat Enterprise Linux called CoreOS. It is available on a variety of public cloud providers as well as private cloud and infrastructure, including IBM Z Series (using z/VM as the hypervisor).
This consistency of technology, interface and operation across multiple disparate hybrid cloud platforms gives OCP a strong market presence, and the extension onto Z Series brings application solutions closer to the core business data, reducing risk and improving performance.
The full implementation of OCP requires some serious infrastructure behind it, as well as management, support, backup and recovery, etc, etc. The focus of this blog post is to get OCP Local running. This is a single system implementation running on (in our case) a Windows 10 laptop.
Platform
Before you get started, you will need a (if you’re following these notes) Windows 10 or better PC with (deep breath):
- At least 4 cores ( = 8 threads with hyperthreading)
- Virtualisation technologies enabled in your BIOS (specifically Hyper-V support). If it’s your own laptop, this is usually fairly simple to sort out. If it’s your company laptop, there may be some negotiation involved! You will need to enable Hyper-V support in Windows as well and will also need to enable CLI support. Both of these will require local administration authority in Windows.
- 24GB RAM although 32GB would be better
- Around 50GB disk space – preferably SSD based.
This looks quite onerous, but (probably) aligns well with a modern developer laptop. The memory in particular is critical, as OCP Local dies a horrible slow death if physical paging gets going.
Try to keep in mind that what we’re trying to achieve with this is a virtualised model of something that typically runs on at least 5 guests with significant resources, so the more resources that we can give to OCP-L, the better.
Downloading and Installing
If you don’t have one, sign up for a Red Hat developer account:
https://developers.redhat.com/
There’s a “sign me up” link at the bottom of the page.
Go to the Red Hat console for OpenShift, login with your developer account and download the OCP Local installer and “Pull secret” (which you’ll need during the install):
https://console.redhat.com/openshift/create/local
Unzip and run the install image (crc-windows-amd64.msi).
It’s worth noting that Hyper-V is not generally enabled by default in Windows, and you’ll need to go to the “Programs and Features” control panel applet (still available from “Settings” -> “Apps and features” page (top right)). It should look like this:
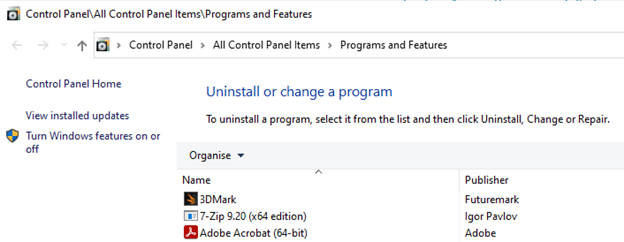
Click on the “Turn Windows features on or off” (requires Admin auth) and make sure that the Hyper-V elements are enabled:
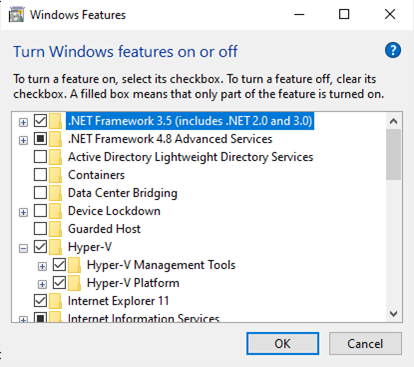
If you have to enable them, then you’ll need to reboot. Note that whilst this turns on all of the features and services, for some reason it doesn’t enable the CLI, which is used by OCP Local and has to be enabled separately from an Admin command prompt like this:
DISM /Online /Enable-Feature /All /FeatureName:Microsoft-Hyper-V
Local admin authority may also be challenging if this is a corporate rather than personal laptop.
Configuring and First Start
Configure from a (non-admin) command prompt:
crc setup
and start it with:
crc start
This prompts for the pull secret that we downloaded with the installer. We did download it, didn’t we? If not, go back here to get it:
https://console.redhat.com/openshift/create/local
At this point, we ran into a challenge with getting ports opened and forwarded from the host to the guests inside crc:
INFO Creating CRC VM for openshift 4.11.3…
INFO Generating new SSH key pair…
INFO Generating new password for the kubeadmin user
INFO Starting CRC VM for openshift 4.11.3…
failed to expose port 127.0.0.1:2222 -> 192.168.127.2:22: listen tcp 127.0.0.1:2222: bind: An attempt was made to access a socket in a way forbidden by its access permissions.
Initially we thought that this must be firewall related, but crc registers properly. Following some advice from an article on stackoverflow.com we found that this could be “managed” by bouncing the Host Network Service on Windows for each occurrence, like this (from and Admin command prompt):
net stop hns && net start hns
We needed to do this for two OCP Local ports: 2222 and 6443. Note that these are one-off “fixes” and once successfully started, subsequent restarts were trouble free.
Once fixed, startup completes with the following messages:
Started the OpenShift cluster.
The server is accessible via web console at:
https://console-openshift-console.apps-crc.testing
Log in as administrator:
Username: kubeadmin
Password: LkZUy-YH8J4-HT9ME-LB4nS
Log in as user:
Username: developer
Password: developer
Use the ‘oc’ command line interface:
> @FOR /f “tokens=*” %i IN (‘crc oc-env’) DO @call %i
> oc login -u developer https://api.crc.testing:6443
You can now logon with your browser and the URL given as developer/developer and follow the tour.
A Really Simple Example Application in Go
This was pulled together as part of some work on Go on z/OS and is a tiny web server that just issues a “hello” message and the current date/time. It’s useful to pipeclean the environment:
goweb. go

package main
import (
"fmt"
"net/http"
"time"
)
func timestamp(now time.Time) string {
rv := fmt.Sprintf("%04d-%02d-%02d %02d:%02d:%02d", now.Year(), now.Month(), now.Day(), now.Hour(), now.Minute(), now.Second())
return (rv)
}
func reqHandler(w http.ResponseWriter, r *http.Request) {
now := time.Now()

qry := r.URL.Query()

thing := qry.Get("thing")

fmt.Fprintf(w, "[%s] - Go Web - HellonPath = %snQuery = %snthing = %sn", timestamp(now), r.URL, qry, thing)

}
func main() {
http.HandleFunc("/", reqHandler)
http.ListenAndServe(":9999", nil)
}
We’ve added a Dockerfile to the repo root to support building this into a golang container:
Dockerfile
FROM golang:1.11

RUN mkdir -p /go/src/app

WORKDIR /go/src/app

COPY ./goweb/goweb.go /go/src/app

COPY ./goweb/go.mod /go/src/app/

EXPOSE 9999

RUN go build

CMD ["./app"]
Building the App from the Web Console
Logon to the web console using the URL from the “crc start” (see above), or if you’ve got the command prompt still open by using the “crc console” command, which opens the default browser with the correct URL.
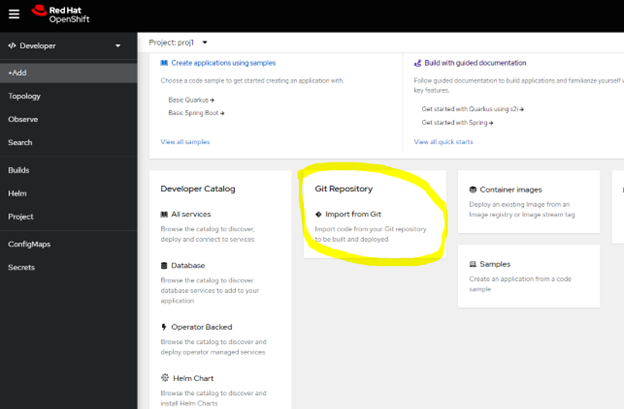
In Developer view (top left – as opposed to Administrator view) create a project – e.g. proj1, then click on the +Add (left-hand) menu item to add resources to the project. In here, we’ll reference our Git based application (goweb, above) by its Dockerfile so that OCP can do the work of building it.
In +Add, select “Import from Git” in the “Git Repository” tile
Provide the Git repo URL – https://github.com/db2dinosaur/zGo.git if you want to use the example above. When running this, OCP prompted for an import strategy:
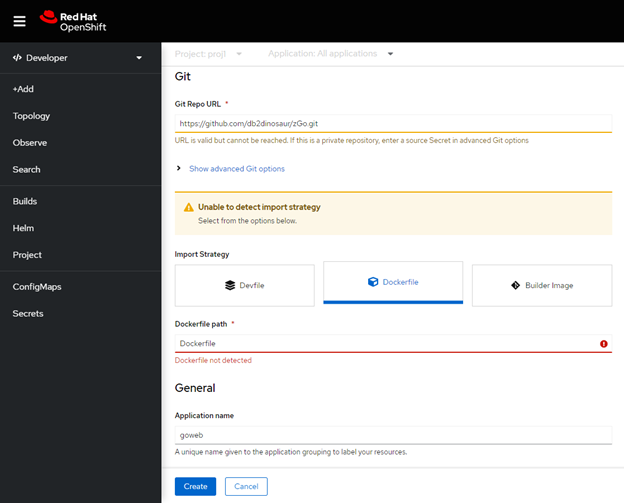
and scrolling down a bit:
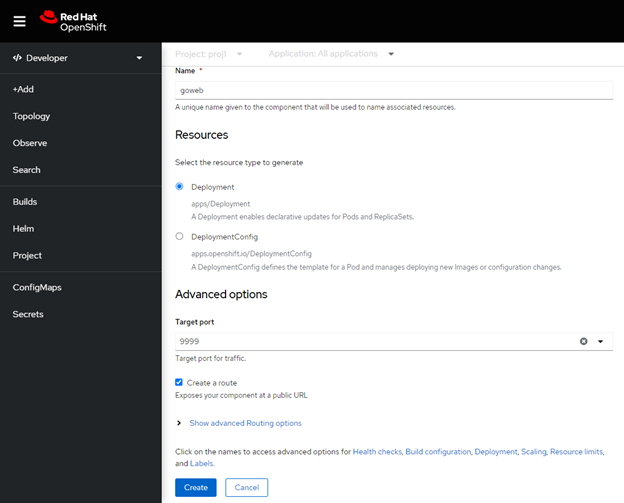
The advanced options let us tell OCP what port the application appears on (it creates a “service” for this) and whether or not to create a “route” which provides an external contact point and DNS URL.
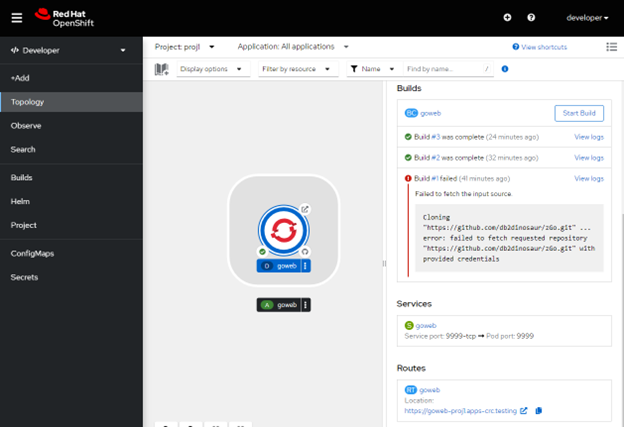
Once set, click on “Create” which drives the pull from Git and the Dockerfile driven build. Following successful completion, the application is deployed in a pod with a service and route created to make the app available. You can find this in the Topology view – click on your app deployment and scroll down the right hand details list to the “route”:
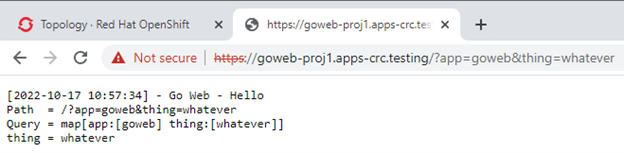
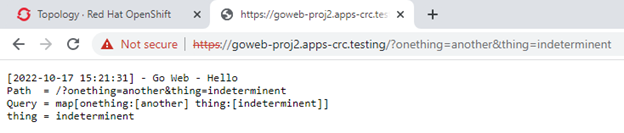
Copying this and then pasting into the browser with some extra parameters:
In case you’re wondering, the first build failed (noted in the Builds list on the right, above the Services and Routes listing) because I forgot to make the GitHub repo public, which wouldn’t have made it terribly useful for this article! You can access private repos, but you’d need to set up a secret to store the GitHub token to do this.
Building the App from the CLI
The command line interface (CLI) for OpenShift is “oc”. This is delivered as part of the OCP Local deployment – as noted in the last parts of the startup output. For use, you can expose the required command with “crc oc-env”:
C:UsersJames>crc oc-env
SET PATH=C:UsersJames.crcbinoc;%PATH%
REM Run this command to configure your shell:
REM @FOR /f “tokens=*” %i IN (‘crc oc-env’) DO @call %i
The useful bit being:
SET PATH=C:UsersJames.crcbinoc;%PATH%
In this case, C:UsersJames is my home directory, and where we installed the product.
To login to OCP using the credentials from the startup and the OCP Local URL:
oc login -u developer -p developer https://api.crc.testing:6443
Creating a new project to work in:
oc new-project proj2
Once the project namespace is available, we can create an application within it. Note that labelling is extremely important in OCP and the use of the “app” label helps bind all of the aspects together.
-
- Create a working directory:
- mkdir zGo
- cd zGo
- Clone our source code repo here:
- git clone https://github.com/db2dinosaur/zGo.git
C:UsersJameszGo>git clone https://github.com/db2dinosaur/zGo.git
Cloning into ‘zGo’…
remote: Enumerating objects: 200, done.
remote: Counting objects: 100% (200/200), done.
remote: Compressing objects: 100% (127/127), done.
remote: Total 200 (delta 81), reused 154 (delta 42), pack-reused 0
Receiving objects: 100% (200/200), 12.24 MiB | 6.21 MiB/s, done.
Resolving deltas: 100% (81/81), done. - Move into the repo clone:
- cd zGo
- Create our Docker strategy app (called goweb again) based on the current working directory (which holds the Dockerfile):
-
- oc new-app . – – strategy=docker – – labels=”app=goweb” – – name=goweb
-
- Create a working directory:
<C:UsersJameszGozGo>oc new-app . --strategy=docker --labels="app=goweb" --name=goweb
warning: Cannot check if git requires authentication.
--> Found container image 43a154f (3 years old) from Docker Hub for "golang:1.11"
* An image stream tag will be created as "golang:1.11" that will track the source image
* A Docker build using source code from https://github.com/db2dinosaur/zGo.git#main will be created
* The resulting image will be pushed to image stream tag "goweb:latest"
* Every time "golang:1.11" changes a new build will be triggered
* WARNING: this source repository may require credentials.
Create a secret with your git credentials and use 'oc set build-secret' to assign it to the build config.
--> Creating resources with label app=goweb ...
imagestream.image.openshift.io "golang" created
buildconfig.build.openshift.io "goweb" created
Warning: would violate PodSecurity "restricted:v1.24": allowPrivilegeEscalation != false (container "goweb" must set securityContext.allowPrivilegeEscalation=false), unrestricted capabilities (container "goweb" must set securityContext.capabilities.drop=["ALL"]), runAsNonRoot != true (pod or container "goweb" must set securityContext.runAsNonRoot=true), seccompProfile (pod or container "goweb" must set securityContext.seccompProfile.type to "RuntimeDefault" or "Localhost")
deployment.apps "goweb" created
service "goweb" created
--> Success
Build scheduled, use 'oc logs -f buildconfig/goweb' to track its progress.
Application is not exposed. You can expose services to the outside world by executing one or more of the commands below:
'oc expose service/goweb'
Run 'oc status' to view your app.
- The build takes a while to finish (a few minutes), but we can use the following to check the status:
- oc status
Note that this really gives the real status, so whilst the build is running there may be a deployment shown in error – e.g.
- oc status
C:UsersJameszGozGo>oc status
In project proj2 on server https://api.crc.testing:6443
svc/goweb - 10.217.5.49:9999
deployment/goweb deploys istag/goweb:latest <-
bc/goweb docker builds https://github.com/db2dinosaur/zGo.git#main on istag/golang:1.11
build #1 running for about a minute - 25edd39: goweb-build (James <james.gill@triton.co.uk>)
deployment #2 running for 2 minutes - 0/1 pods (warning: 3 restarts)
deployment #1 deployed 2 minutes ago - 0/1 pods growing to 1
Errors:
* pod/goweb-cbcd5688d-tzn77 is crash-looping
1 error, 1 info identified, use 'oc status --suggest' to see details
This improves when the build has completed:
C:UsersJameszGozGo>oc status
In project proj2 on server https://api.crc.testing:6443
svc/goweb - 10.217.5.49:9999
deployment/goweb deploys istag/goweb:latest <-
bc/goweb docker builds https://github.com/db2dinosaur/zGo.git#main on istag/golang:1.11
deployment #3 running for 13 seconds - 1 pod
deployment #2 deployed 3 minutes ago
deployment #1 deployed 3 minutes ago
1 info identified, use 'oc status --suggest' to see details.
- OCP deploys the app and creates a service, so we just need to create the edge route so that we can access it:
- oc create route edge goweb –service=goweb
C:UsersJameszGozGo>oc create route edge goweb --service=goweb
route.route.openshift.io/goweb created
- Check:
- oc get routes
C:UsersJameszGozGo>oc get routes
NAME HOST/PORT PATH SERVICES PORT TERMINATION WILDCARD
goweb goweb-proj2.apps-crc.testing goweb 9999-tcp edge None
This shows that the app is exposed as https://goweb-proj2.apps-crc.testing/ hence:
Conclusions
The OCP Local platform is very useful for gaining experience with OCP, whether that be from the point of view of developing and delivering applications, or in terms of performing basic administration. Whilst the footprint requirements are fairly substantial, the resulting tool provides a way to test developer builds and deployments into OCP and to optimise those Dockerfiles!