

Introduction
Having created a Single Node OpenShift (SNO), we have the default cluster administrator “kubeadmin” but no other users. OAuth (Open Authorisation framework) provides the means to define or integrate additional user identities which can then be given context in OpenShift.
OAuth has a large number of identity providers available in OpenShift – see here – supporting a variety of methods from Google, GitHub and LDAP authentication, down to “htpasswd” file based authentication.
In this blog post, we’ll run through setting up htpasswd – which we selected mostly because it is fairly simple to setup, and didn’t require us to define a lot of additional users on an external service.
Setting Up the htpasswd OAuth Identity Provider
The high level activities to achieve this are:
- Create an htpasswd file containing the userids and encrypted passwords for your users
- Create a secret containing the htpasswd file
- Add the htpasswd identity provider (referencing the secret) to the OAuth configuration
Creating the htpasswd File
Make the htpasswd command available – e.g.
RHEL : sudo yum install -y httpd-tools
Run the command to create the file
htpasswd-c -B -b users.htpasswd <user> <password>
Then for each additional user:
htpasswd -B -b users.htpasswd <user> <password>
NB the “-c” creates the output file, or truncates it if it already exists – only use it in the first command.
Creating the Secret
Through the OpenShift CLI “oc” command:
oc create secret generic htpass-secret \

--from-file=htpasswd=users.htpasswd \

-n openshift-config
Or by YAML:
apiVersion: v1

kind: Secret

metadata:
name: htpass-secret

namespace: openshift-config
type: Opaque

data:
htpasswd: <base64_encoded_htpasswd_file_contents>
Where <base64_encoded_htpasswd_file_contents> can be created like this:
cat users.htpasswd | base64
Configuring the Identity Provider
Now we add the htpasswd identity provider to the OAuth configuration. In our case, OAuth has no prior configuration and the process is simple:
With htpasswd-oauth-provider.yaml:
kind: OAuth

metadata:
name: cluster
spec:
identityProviders:

- name: htpasswd

challenge: true

login: true

mappingMethod: claim

type: HTPasswd

htpasswd:

fileData:

name: htpass-secret
Note the fileData stanza which provides reference to the secret holding the htpasswd file.
User Roles
User roles and roles based access control is a huge subject, which I’m going to skirt over in this blog post, but suffice to say we’d like our users to have specific roles and constraints when logged on. We created:
- ocpadmin = cluster admin
- james = namespace / project admin for a development effort
- devuser = namespace / project edit auth
Changes to Logon on the Web Console
Rather than a simple login screen – just user and password prompts – for kubeadmin – we now get a number of optional providers:
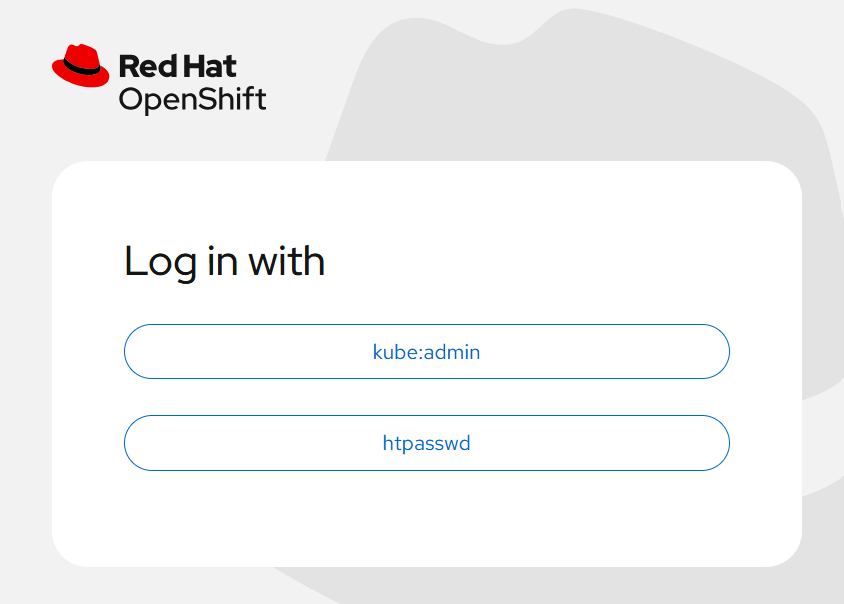
We can now logon to the cluster with the new users that we defined in htpasswd using the second button, but still have access to kubeadmin login through the first.
I’ve Made a Mistake – How Do I Fix It?
This is a bit like a blooper real at the end of a Jackie Chan movie. The following are things that I goofed when working through this content, and how I fixed them.
- I forgot to remove the “-c” from my htpasswd command when creating the file. This meant that rather than the 3 accounts that I was hoping to create, I’d only created the last one – devuser.
- I’d suggest showing the contents of the file before proceeding. There’s a line for each user that begins with the user name in place text – the password is strongly encrypted.
- If you did get all the way to logging on before finding that you’re missing most of your users, fix the original source htpasswd file and then re-create the secret with the new version:
oc create -f htpasswd-secret – -dry-run=client -o yaml | oc replace -f –
- I gave the identity a stupid name and I want to rename it. Actually, I was just following the documentation which suggested using “my_htpasswd_provider”, which all works, but that is the name that appears on the log in button!
You can absolutely do this (“oc edit oauth cluster” and change the htpasswd identity provider name), but then you will have to tidy up the accounts that have already been claimed through logon. This involves deleting the identity and the user:
$ oc get user

NAME       …   FULL NAME   IDENTITIES

james      …               my_htpasswd_provider:james

ocpadmin   …               htpasswd:ocpadmin
$ oc delete identity my_htpasswd_provider:james

identity.user.openshift.io "my_htpasswd_provider:james" deleted

$ oc delete user james

user.user.openshift.io "james" deleted
$ oc get user

NAME       …   FULL NAME   IDENTITIES

ocpadmin   …               htpasswd:ocpadmin
Now, logging back in as “james”, check that the user is claimed by the right provider:
$ oc get user

NAME       …   FULL NAME   IDENTITIES

james      …               htpasswd:james

ocpadmin   …               htpasswd:ocpadmin
What’s Coming Next?
In the next blog, we’ll look at providing from persistent storage in our Single Node OpenShift environment so that we can give a permanent home to some database files.
As always, if you have any questions or comments, please reach out to us through the comments section.