
Starting with DB2 11.1 there is increasing support for using cloud object storage such as AWS S3 via remote storage aliases. As of writing support for remote storage aliases is limited to the INGEST, LOAD, BACKUP and RESTORE commands however, and requires local disk to use as a staging area. If you are using an earlier version of DB2 where remote storage aliases are not available, don’t have the local disk free to use as a staging area, or the particular command you are using isn’t supported you may still be able to make use of object storage using named pipes and a utility to interface with the object storage service.
In this blog we look at how to set up the open source s3cmd utility to talk to an S3 bucket, then use the DB2 export and import commands with s3cmd to directly store and access data in S3.
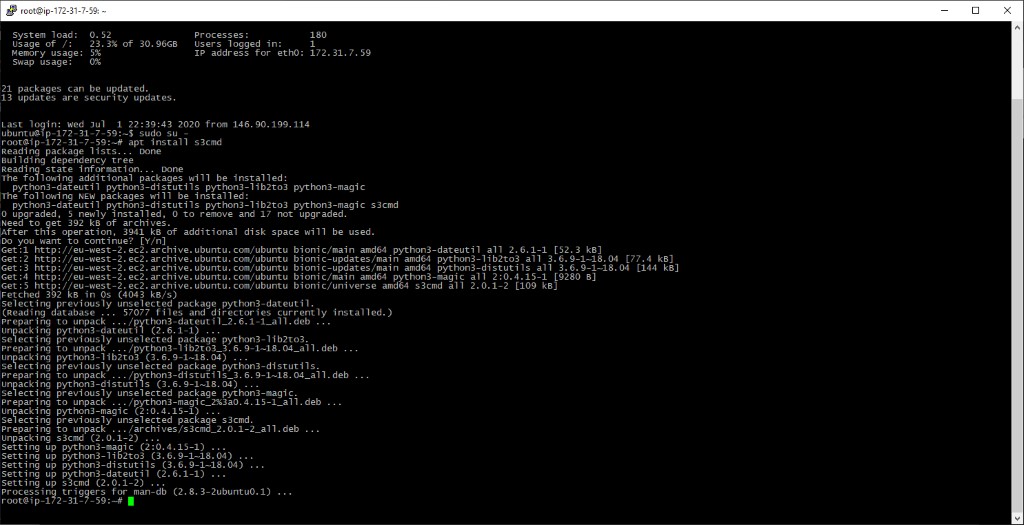
Step One – Install s3cmd
Download links for the s3cmd utility can be found at the s3tools.org website, alternatively it is in the add-on repos for mainstream Linux distributions. In this example we are using an Ubuntu VM so using the apt package manager we can install s3cmd and its dependencies:
sudo -s
apt install s3cmd
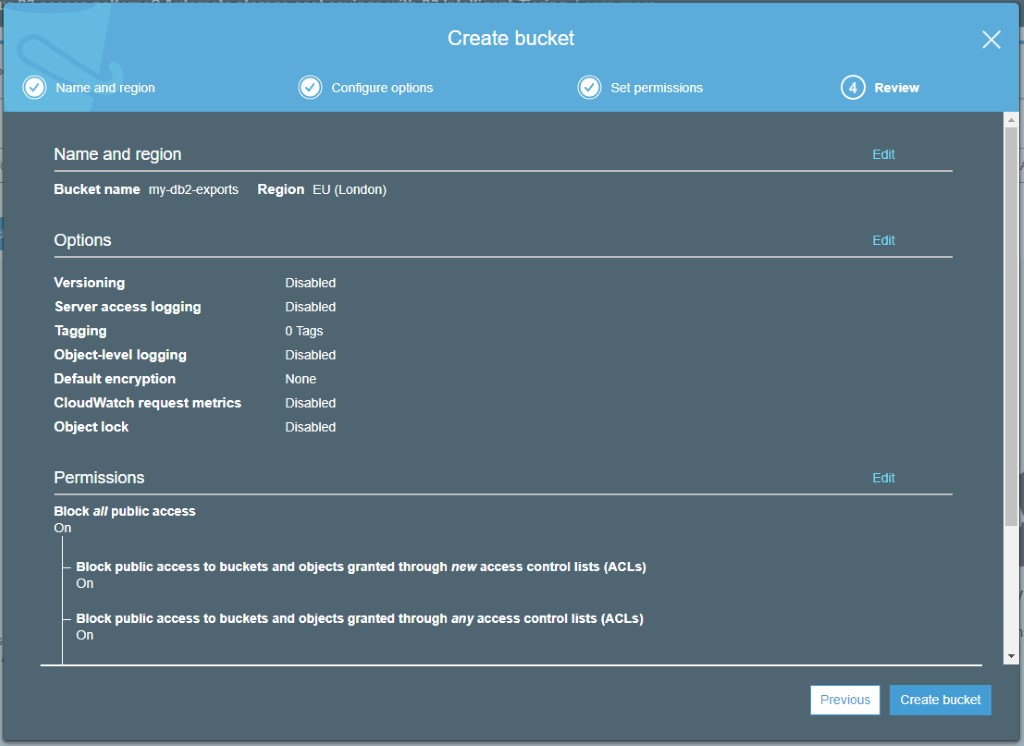
Step Two – Create an S3 Bucket
We’ll need an S3 bucket to store our files in – if you don’t have one available, in the AWS console go to S3 under Storage and click Create Bucket. Enter a name for the bucket – you don’t need to change any other options unless you want to, but definitely make sure Block all public access is set to On. Don’t be the next company to make headlines for exposing data in the cloud!
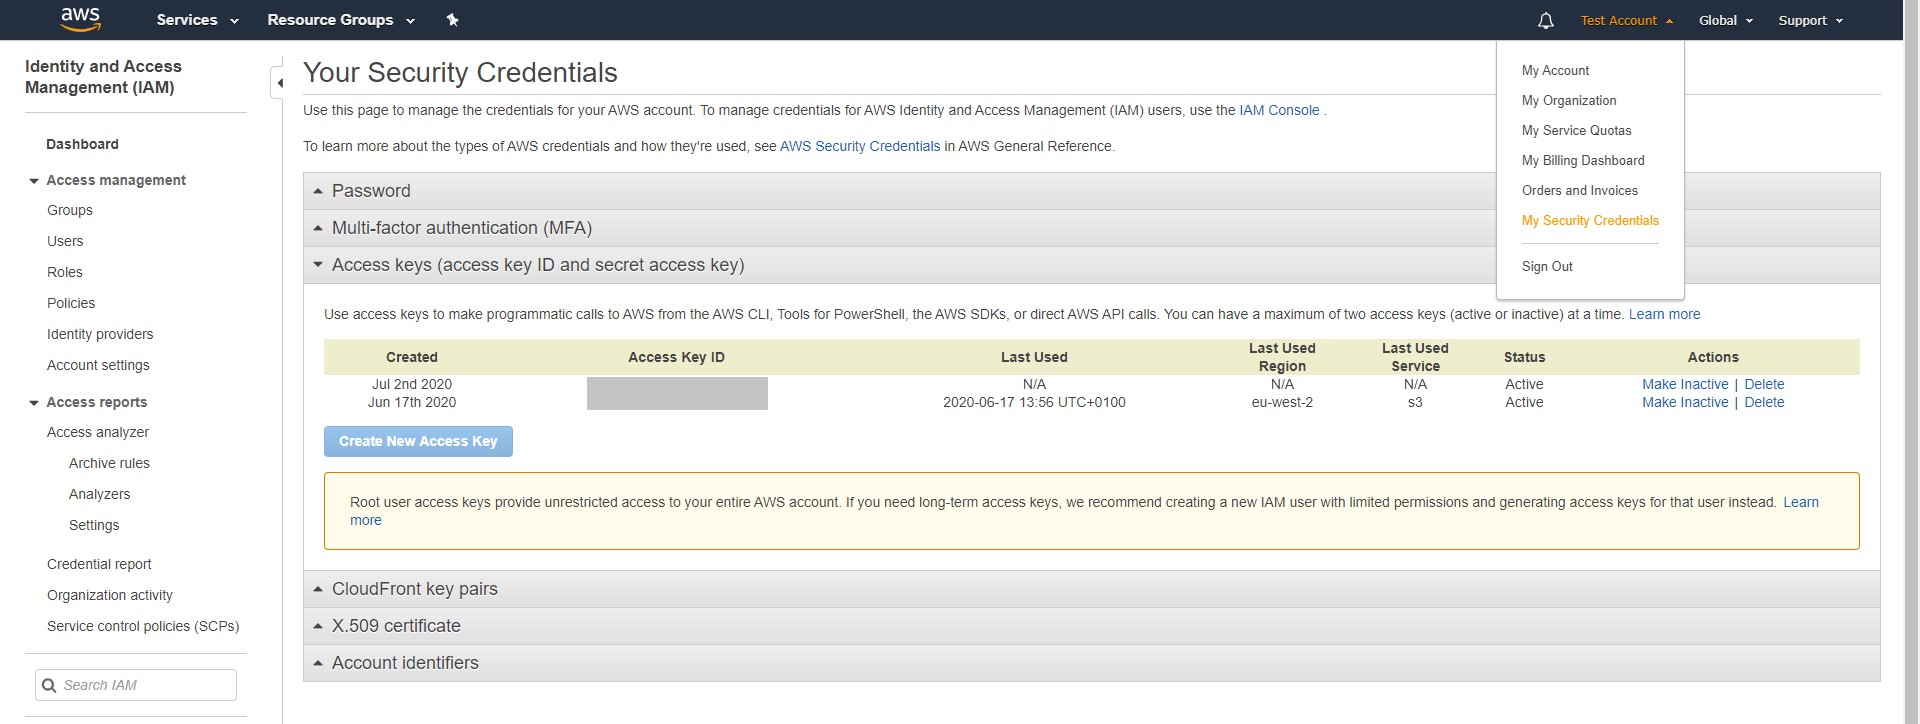
Step Three – Create Access Key for S3
For s3cmd to use our bucket it will need some credentials – these can be created in the AWS console by going to your account dropdown, selecting My Security Credentials and expanding the Access keys section then clicking Create New Access Key. You will be provided with the Access Key ID and the associated Secret Access Key – note these down for use in the next step.
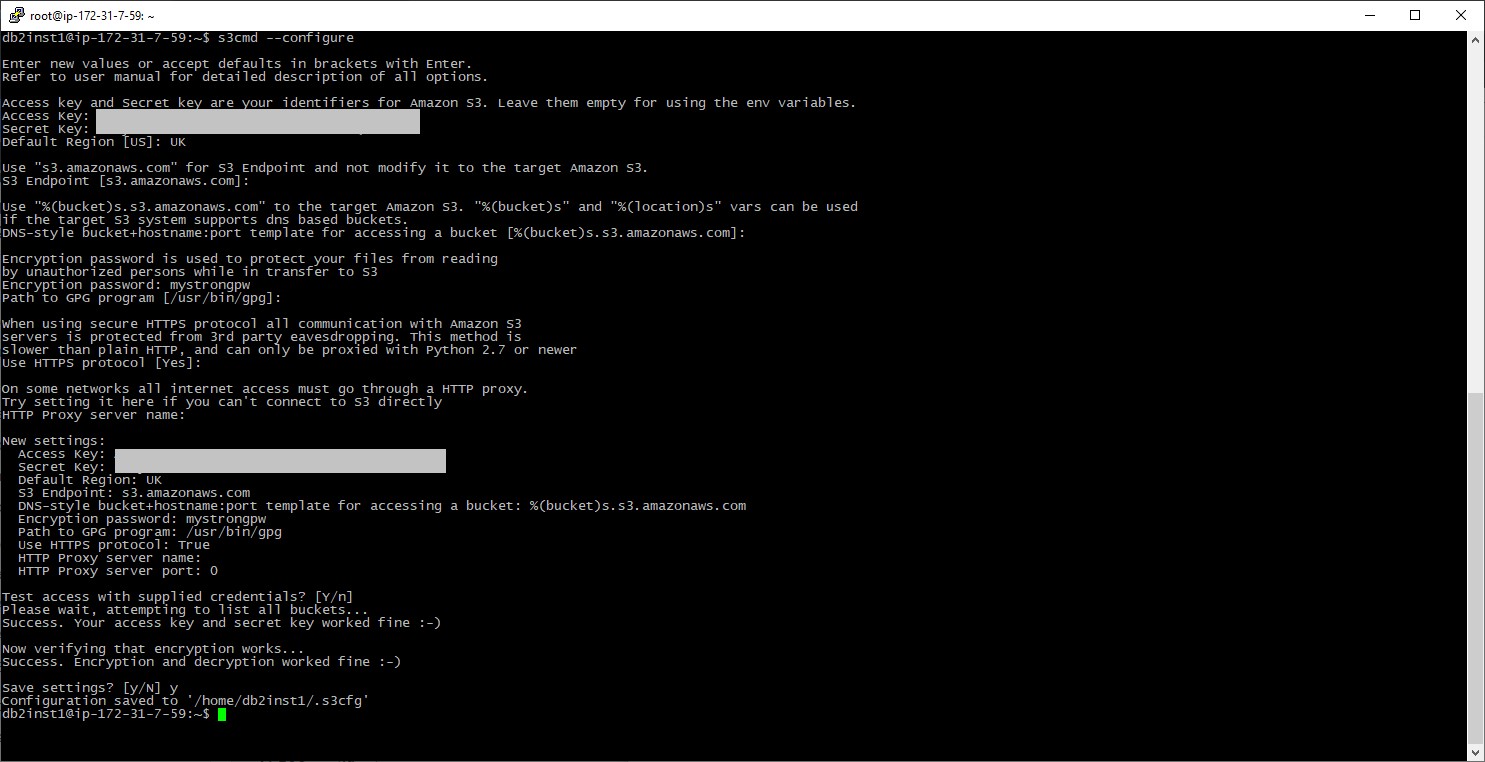
Step Four – Configure s3cmd
Now we have a bucket and the credentials to access it, we need to configure s3cmd. In this case we will do this as the db2inst1 user as that is the account that will run the export/import commands. Running the utility with the – – configure option will provide a set of prompts to input the required information (or accept defaults) and test the configuration – in my case I’ve inputted the keys, UK for the Default region, an Encryption password, and used the defaults for everything else. If all goes well the tests will give success messages and the option to save the configuration:
su – db2inst1
s3cmd – –configure
Step Five – Running an Export
Configuration complete, you should be able to use ‘s3cmd ls’ to list the contents of the configured bucket with no errors. We can now run the export to s3 storage. First set up a named pipe, in this case called ‘mypipe’, then create a background job to feed output from this pipe firstly through gzip to save on network transmission time and storage costs, then into the s3cmd utility:
mkfifo /tmp/mypipe
gzip -9 -c < /tmp/mypipe | s3cmd -q put – s3://my-db2-exports/employee.del.gz &
You can check the pipe and background job exist using the ls and jobs commands. Once they are set up, connect to DB2 and run the export as normal, specifying the pipe as the output file:
db2 connect to sample
db2 “export to /tmp/mypipe of del select * from employee”
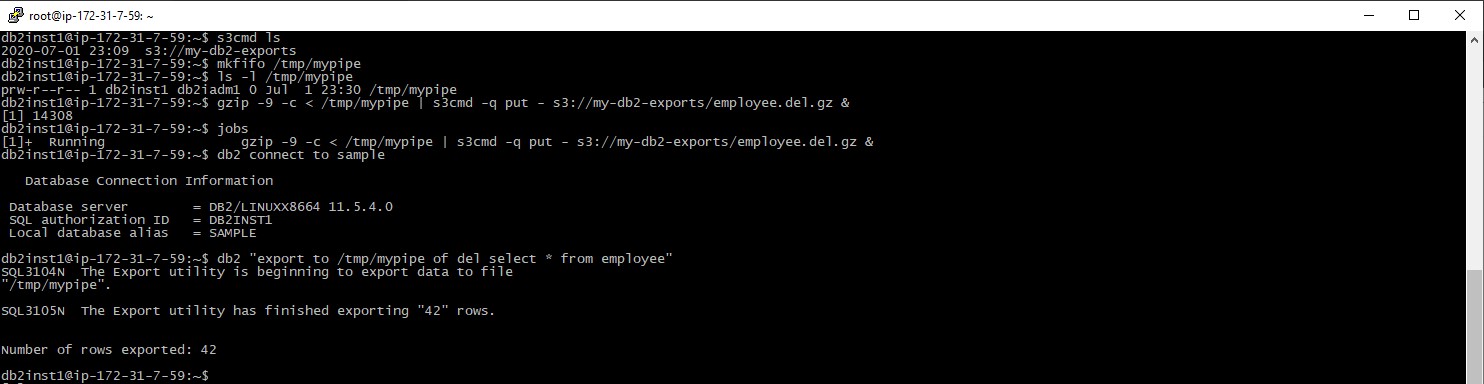
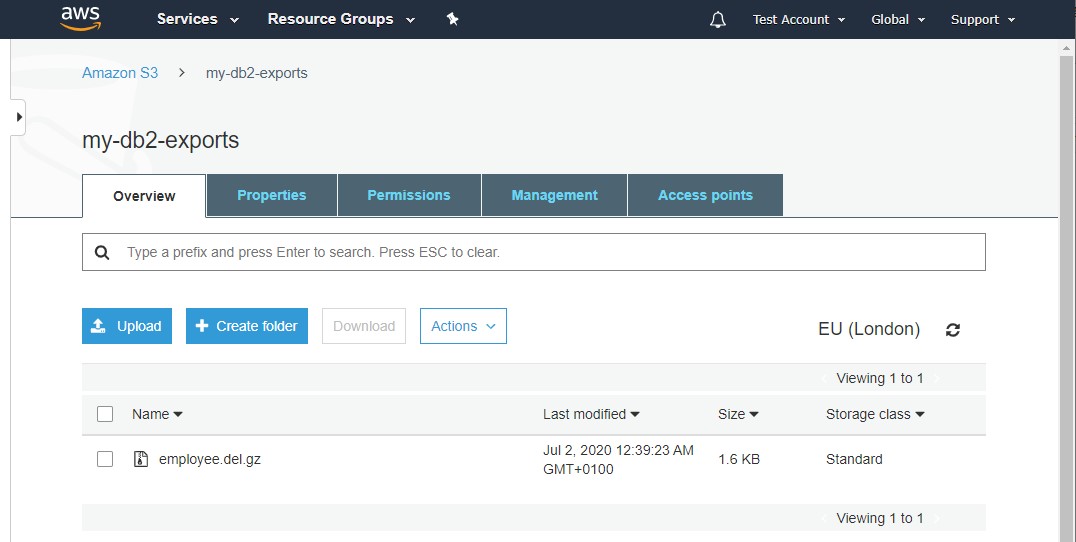
All being well the export will complete as per normal and the export file will be stored in the S3 bucket:
Step Six – Running an Import
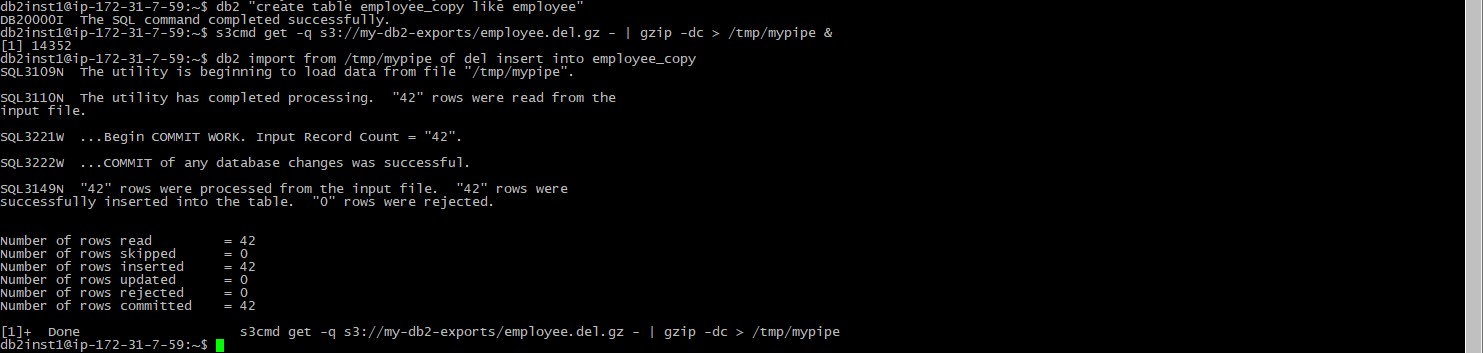
Now we have our data in S3, we’ll import it directly back into the database into a new table. If you are following directly on from the previous step, although the redirect job finished the named pipe should still exist – if not create it as per the command in step Five, and remember to connect to the database prior to running these commands. First we’ll create an empty copy of the employee table, then feed the named pipe with data retrieved via s3cmd and decompressed in gzip. Once the background job to feed the pipe is running we can run an import normally using the pipe as the input file:
db2 “create table employee_copy like employee”
s3cmd get -q s3://my-db2-exports/employee.del.gz – | gzip -dc > /tmp/mypipe &
db2 import from /tmp/mypipe of del insert into employee_copy
And that’s it, the data has been imported from the file stored in S3. The job to feed the pipe completes, and you can then rm the named pipe to clean up.
A Note About the s3cmd EPIPE or ECONNRESET Message
Occasionally when starting an export s3cmd will throw a worrying looking error and warn it is retrying a file part. Unfortunately it doesn’t then output a message saying the retry was successful, but you can expect further messages if it is not – otherwise the export should succeed.

In Summary
Storing exported data in an object store such as S3 opens up many possibilities – not only can Amazon S3 be configured to act as a highly reliable off-server storage area, there are options to migrate data onto cheaper long term storage, make files immutable for audit purposes, or make files available to cloud applications or third parties in a controlled manner. The s3cmd utility supports other cloud storage service providers that use the S3 protocol as well so this process could be used with other providers simply by changing the connection details. This was a quick example on how it is possible to use S3 object storage directly with the DB2 export and import utilities to take advantage of these possibilities.
Here are some links to resources used in this blog:-
- Amazon Web Services: https://aws.amazon.com/
- s3cmd: https://s3tools.org/s3cmd