
Following on from a previous blog about using the s3cmd utility with export and import one of the most asked questions was ‘can I use this with backup’, to which my first thought was… no – the backup file name is generated by DB2 including a timestamp so it wouldn’t be practical to backup to a named pipe. A bit more investigation however revealed my thinking was out of date – DB2 developed the ability to backup to a named pipe in version 11.1. With that feature it should be possible to use s3cmd to backup the database without using a storage alias and the required staging area for the backup file, so let’s try it out.
Step One – Install s3cmd
In the last blog we used an Ubuntu VM running on AWS, but this time we’ll be using a Red Hat VM running on the Triton R&D server. Download links for the s3cmd utility can be found at the s3tools.org website, I downloaded the latest version, unzipped & untarred then ran the setup Python script:
curl "https://deac-ams.dl.sourceforge.net/project/s3tools/s3cmd/2.1.0/s3cmd-2.1.0.tar.gz" -o s3cmd-2.1.0.tar.gz

gunzip s3cmd-2.1.0.tar.gz && tar -xvf s3cmd-2.1.0.tar

cd s3cmd-2.1.0

python setup.py install
Step Two – Create an S3 Bucket
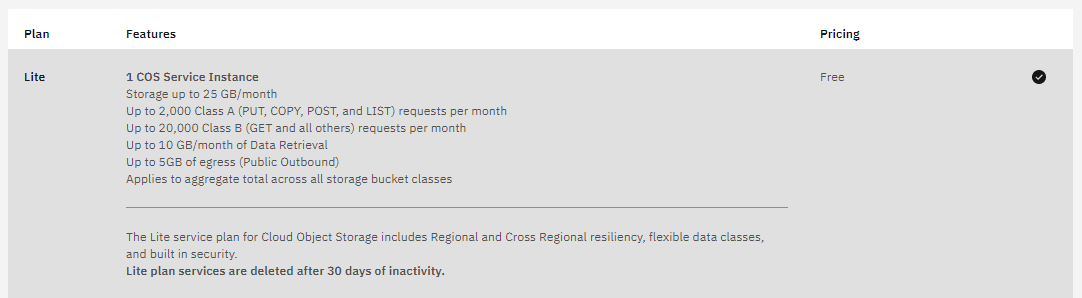
The s3cmd utility is compatible with storage from several cloud providers that utilise the S3 protocol. In the last blog we used AWS, but IBM Cloud currently provide a ‘Lite’ tier of their Cloud Object Storage for no charge which should suffice for this testing:
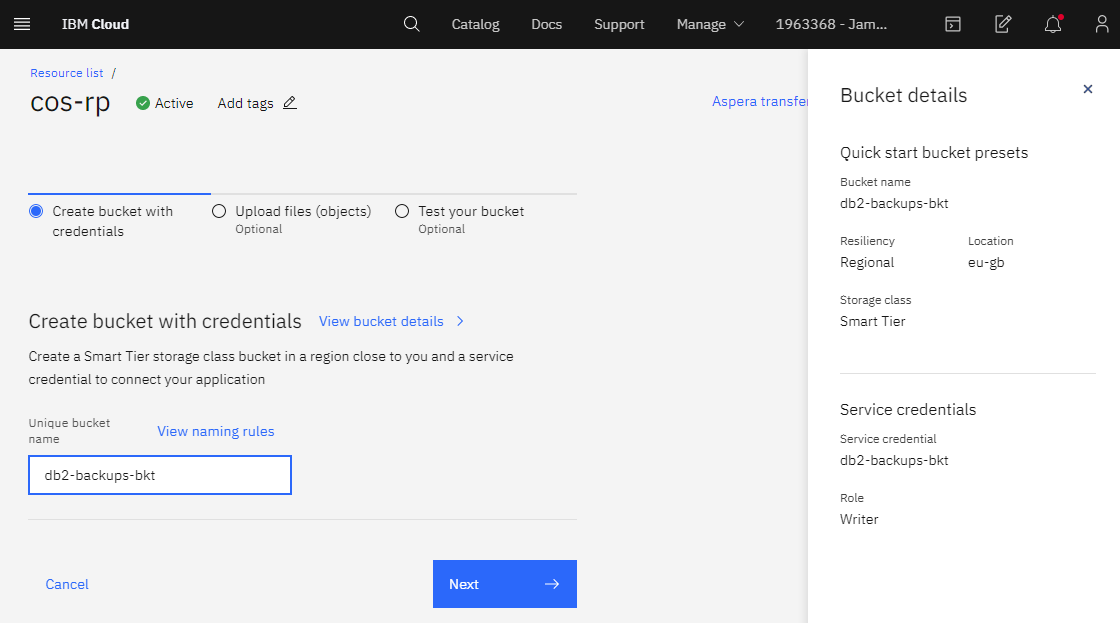
Once you have activated the service there is a handy ‘Predefined bucket’ quick start, just enter the name and click next until the bucket is created:
Step Three – Create Access Keys
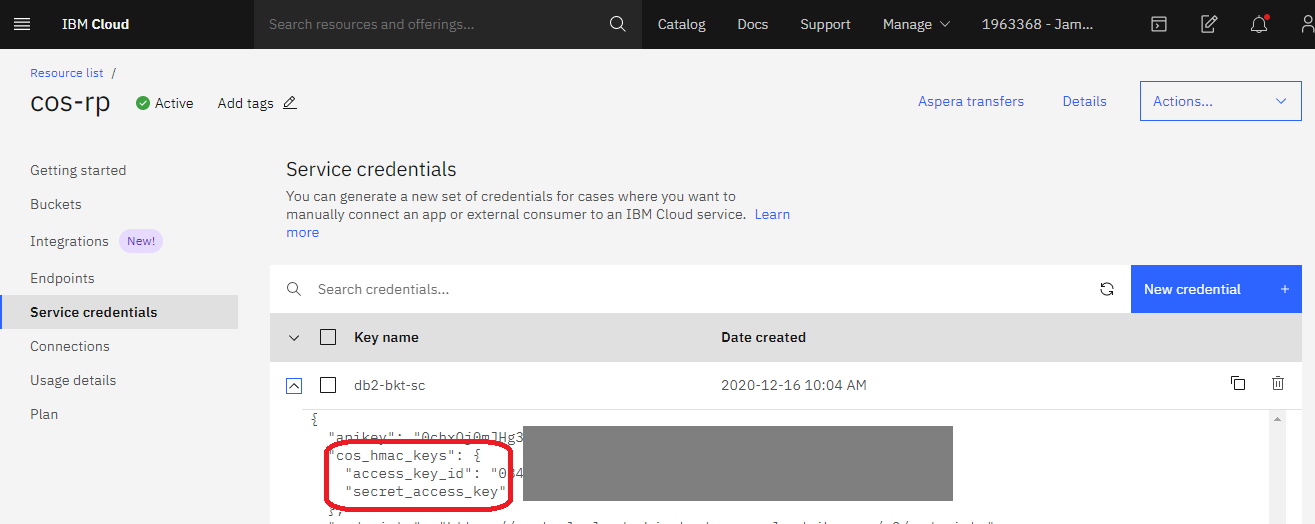
For s3cmd to use our bucket it will need some credentials – these can be created in the Cloud Object Storage resource page in the portal, when creating them remember to choose ‘Include HMAC Credential’ under Advanced options as this will generate the secret_access_key.
Step Four – Configure s3cmd
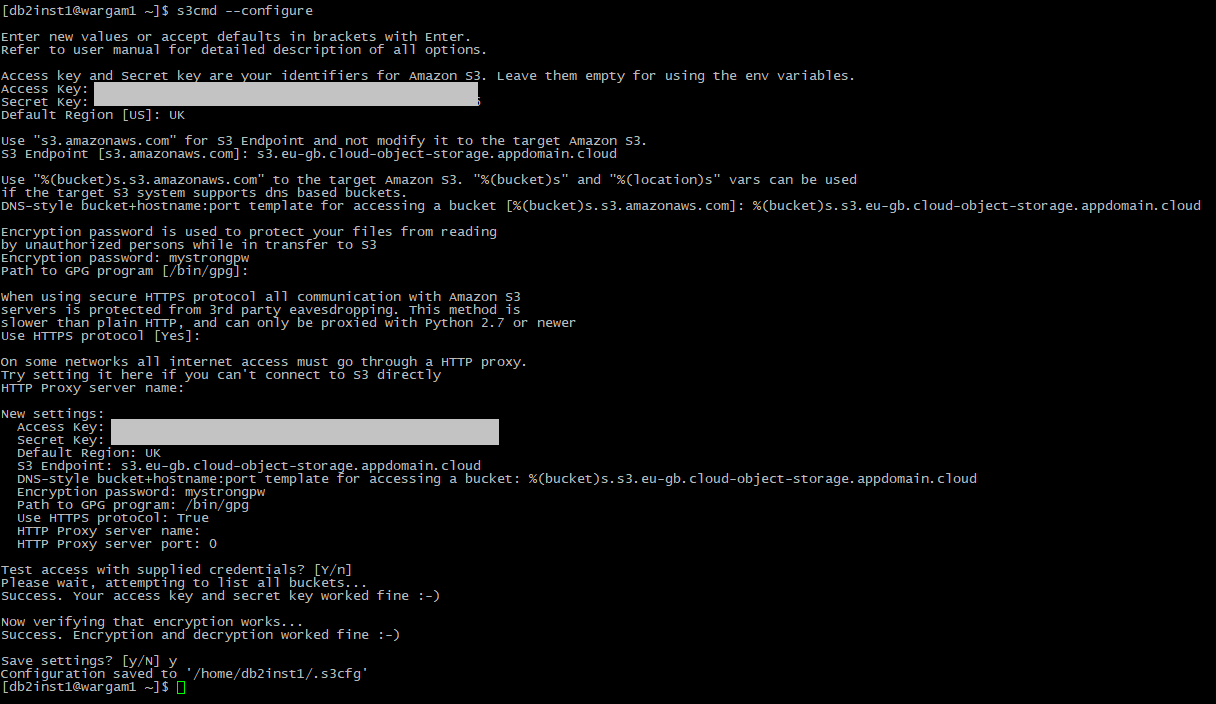
With the bucket and access credentials set up we can configure s3cmd. As in the last blog we’ll do this as the db2inst1 user as that is the account that will run the backup commands. Running the utility with the –configure option provides a set of prompts to input the required information (or accept defaults) and test the configuration – in my case I’ve inputted the keys, UK for the Default region, an Encryption password, and used the endpoints listed in the portal. If all goes well the tests will give success messages and the option to save the configuration:
su – db2inst1

s3cmd --configure
Step Five – Running a Backup
Configuration complete, you should be able to use ‘s3cmd ls’ to list the contents of the configured bucket with no errors. We can now run the backup to the cloud storage. First set up a named pipe, in this case called ‘mypipe’, then create a background job to feed output from this pipe into the s3cmd utility:
mkfifo /tmp/mypipe
cat /tmp/mypipe | s3cmd -q put - s3://db2-backups-bkt/backup_161220_1429.db2 &
Note that this time we are not piping the data through gzip – that’s because DB2 can compress the backup for us. You can check the pipe and background job exist using the ls and jobs commands. Once they are set up, run the backup specifying the pipe as the destination:
db2 backup db sampledb online to /tmp/mypipe compress

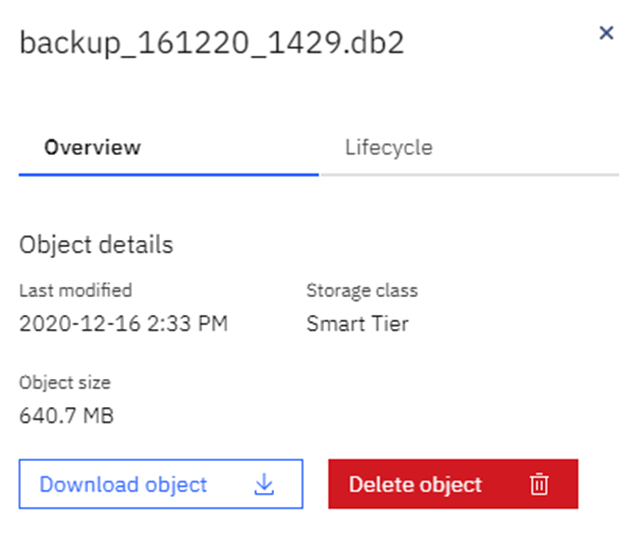
Refreshing the portal shows the backup file is indeed in our cloud storage:
Step Six – Running a Restore
Backing up the database is great but not much use unless we can restore it. There are a couple of ways to go about this – we could pull the file back onto disk and restore from there, but the point of this exercise is to avoid requiring the disk space that would take. Luckily, we can now restore from a named pipe as well. First step is to create a pipe (note the previous one may still exist if not removed after the backup was taken) and feed it with the backup data via s3cmd in a background job, then we can reference it in the restore command:
mkfifo /tmp/mypipe
s3cmd get -q s3://db2-backups-bkt/backup_161220_1429.db2 - > /tmp/mypipe &
db2 restore db sampledb from /tmp/mypipe
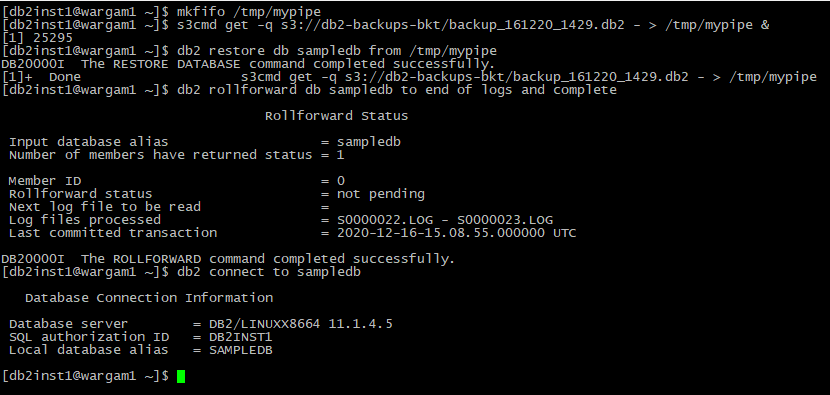
My backup was taken online, so a quick rollforward later and we are up and running.
Why Use s3cmd Instead of a Remote Storage Alias?
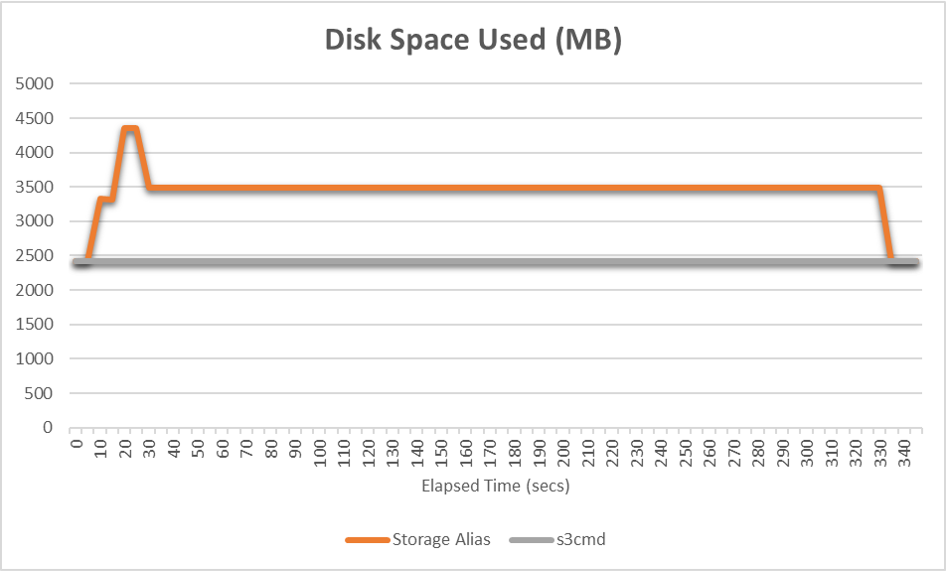
At this point you may be thinking to yourself that’s great, but if we need DB2 v11.1 to backup and restore using named pipes then why not use the remote storage alias features that are built in? The answer is that storage aliases need disk space to stage the backup file, whereas s3cmd will read from the named pipe and transmit the data in small chunks – here’s a graph demonstrating the disk usage while a 1GB database is backed up using a storage alias, versus using named pipes with s3cmd:
If you would like to do your own comparison testing, take a look at the blog by my colleague Damir covering set up of storage aliases.
In Summary
Storing DB2 backups in cloud-based object storage gives us the same benefits we saw for export files – offsite storage, immutable data for audit requirements and the ability to distribute the backup files if needed. Being able to backup and restore a database without requiring the staging space for a remote storage alias is however particularly useful for backups, as larger databases could need a lot of disk space which has to be left unused.
Here are some links to resources used in this blog:-
- IBM Cloud: https://cloud.ibm.com/
- s3cmd: https://s3tools.org/s3cmd