

OK, fair enough, that does sound a bit specialised and will maybe put some people off. Nothing like a good blast of technobabble to send us scurrying to the coffee machine.
What this is getting at is the ability to modify queries on the fly. It’s one of the reasons I’m quite taken with Jupyter Notebooks; the ability to provide some SQL and to run it, take a look at the result set and then tweak the original SQL and re-run it until you get the output you want.
For instance, I have a Jupyter Notebook that contains a fairly large volume of queries that I use as a Health Check for Db2 databases (I did a presentation on this at the recent IDUG NA in Boston if you want to check out some details). The trouble is a lot of the queries will produce a lot of detail. I’m trying to focus on specific pain points and bottlenecks, and I don’t want to inundate our customers with hundreds of rows of data. So, if I have a query that, say, looks for Unused Indexes (a particular bugbear of mine), I might just find I locate half a dozen that are genuinely unused. But some of our customers have huge databases running transactional and OLAP workloads and have had all sorts of indexing solutions thrown at them over the years, with a consequent overhead of loads of unused indexes.
So, I can take my query and start editing the code in the Jupyter Notebook cell to introduce some limits:
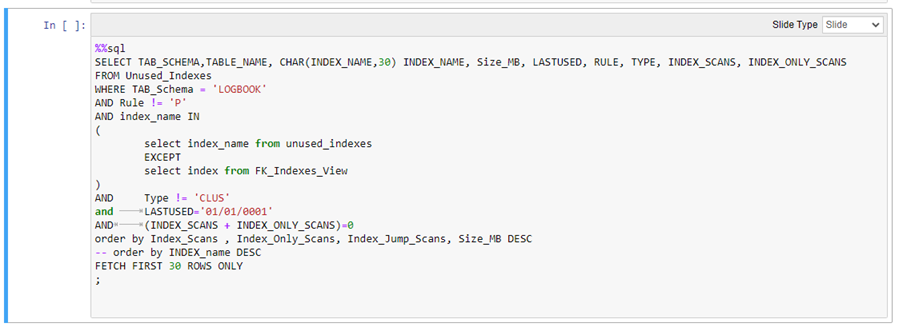
You can see I have
- Limited the query to only look for indexing on tables in a specific schema
- I’ve eliminated Primary Key and Clustering indexes
- I’ve included the size of the index (in descending sequence) in the ORDER BY and
- I’ve limited the result set to just 30 rows
All well and good if you’re a Db2 geek like me and you enjoy messing around with SQL. But what if this is going to be a Notebook that you’re going to make available to not-so techy users? Maybe Data Scientists, Analysts; maybe just ordinary users who need to see what their database contains. What do you do to give them that flexibility without demanding SQL expertise?
One option is to use widgets. In this context, we can say that a widget is a GUI that provides an element of interaction, such as a button, a slider bar, or a dropdown. For my purposes, the button option doesn’t help me out much; you need to know what values to incorporate in the button list and what I need to do is to give the users a GUI option for selecting values to incorporate in some SQL.
Sliders
What I want to do here is to give my users a simple way of inputting a number of some sort into the query without editing SQL. In this case, I’m going to let them limit the number of rows returned.
First thing is to make sure you’ve imported the interactive Python widgets modules:

I have defined the Slider using the code in the cell below. Beneath it you can see the slider GUI, which I moved along until it reaches the value 42
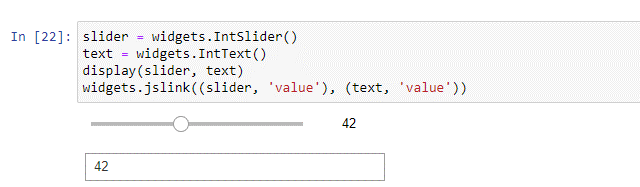
I then trap that value in a variable (row_value in this example)

(that second line is just to echo the value back out, so I can confirm it has got what I selected)
And I then plug that value into a piece of SQL
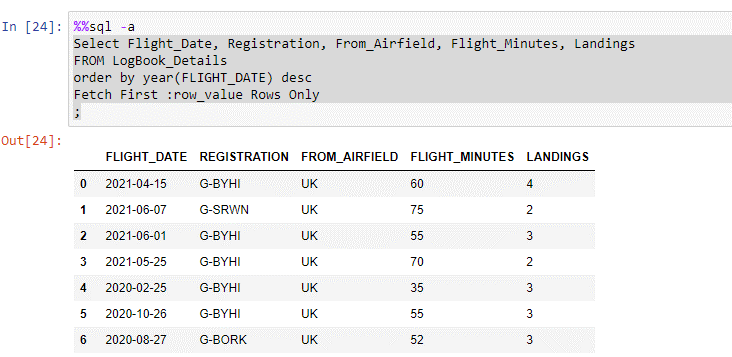
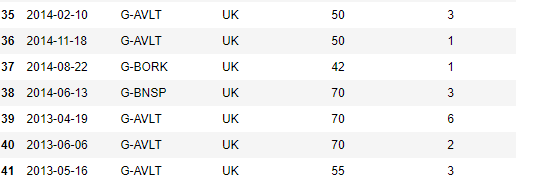
I’ve not shown all the rows in the output cell as 42 is quite a lot for a blog, but the point is you can select the volume of output yourself.
NB note the use of the -a option in the SQL cell; this means that all of the rows in the result set are returned.
Drop-down lists
This is where I think we can get some real value. What I want to be able to do is to run a sub-query to get a list of valid values, present them in a drop-down such that one can be chosen and then run a subsequent query based on that.
-
- Execute a query to get a list of valid values: here all the years that actually exist in my LogBook_Details table

NB note the use of the -r option. This means that rather than returning a Dataframe result set, this option will produce a list of rows. That is how we’re going to provide values to the dropdown itself.
-
- Use the list of values to populate the dropdown

-
- Display the Dropdown GUI and select a value
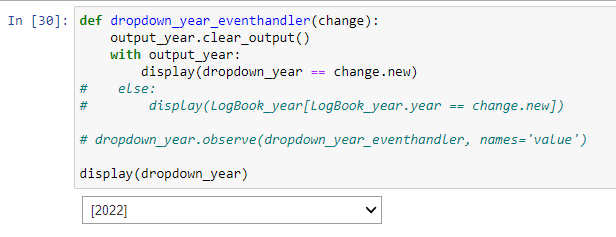
NB: the first displayed value will be [1] which is the Header. You can label that in your query (as Flight_Year, for instance) but it will still be the first value in your list
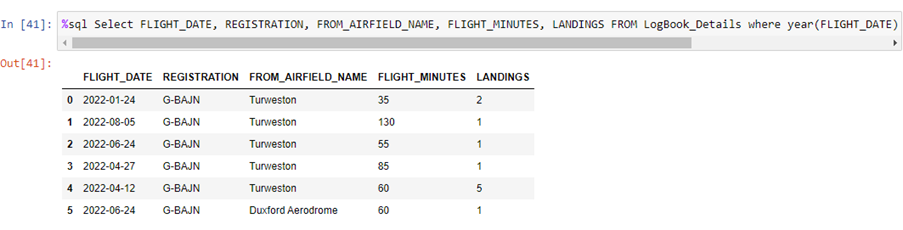
- Run your SQL using that selected value. This is, therefore, only those flight details that occurred in the year 2022
NB: 2 provisos to mention here
-
-
- If you split the SQL over multiple lines using the double percent sign prefix (%%sql) the statement is no longer valid. Not sure what is happening there to be honest. And
- Because the selected value is returned in square brackets, the value can only be used once you have eliminated them, hence the rather cumbersome SUBSTR below.
-

Conclusion
A bit fiddly to incorporate into your Jupyter Notebook and, I’ll be honest, this took quite a lot of trial and error to get right. But I hope you’ll agree that the principle of being able to offer interactive modification of your embedded SQL within a Jupyter Notebook offers some very user-friendly options. Even if it does sound like technobabble.